

A couple of new babies are set to join our extended family soon! Here's a quick little project that's perfect for the new Mommas.

I used Riley Blake Designs' Aqua Chevron laminated cotton with Auqa Crimp coordinating cotton for the binding. The laminate cleans up easily with a damp rag. If you've never sewn with laminate before, see my Top 5 Tips in the previous post, or click the button for the print-friendly instructions.
Diaper Changing Pad
Supplies:
1 yard cute Laminated Cotton Fabric
Cut 1@ 27" x 22" rectangle, 1@ 11" x 22" rectangle and 2@ 9" x 22" rectangles
11" x 22" piece batting or Pellon 987f Fusible Fleece
5/8 yard binding
Cut 6@ 2-1/4" bias strips for binding (see Bias Binding tutorial HERE)2" to 3" Velcro sew-in hook and loop tape
Matching thread
Diapers and wipees, etc.
Instructions:
Step 1) TRIM. Round the top and sides of the 27" x 22" rectangle as pictured.

Step 2) CENTER SECTION. Adhere fusible fleece or batting to the
11" x 22" rectangle, center on wrong side of the large piece,
then trim the top edge to match and baste all edges in place with 1/4" seam.
then trim the top edge to match and baste all edges in place with 1/4" seam.

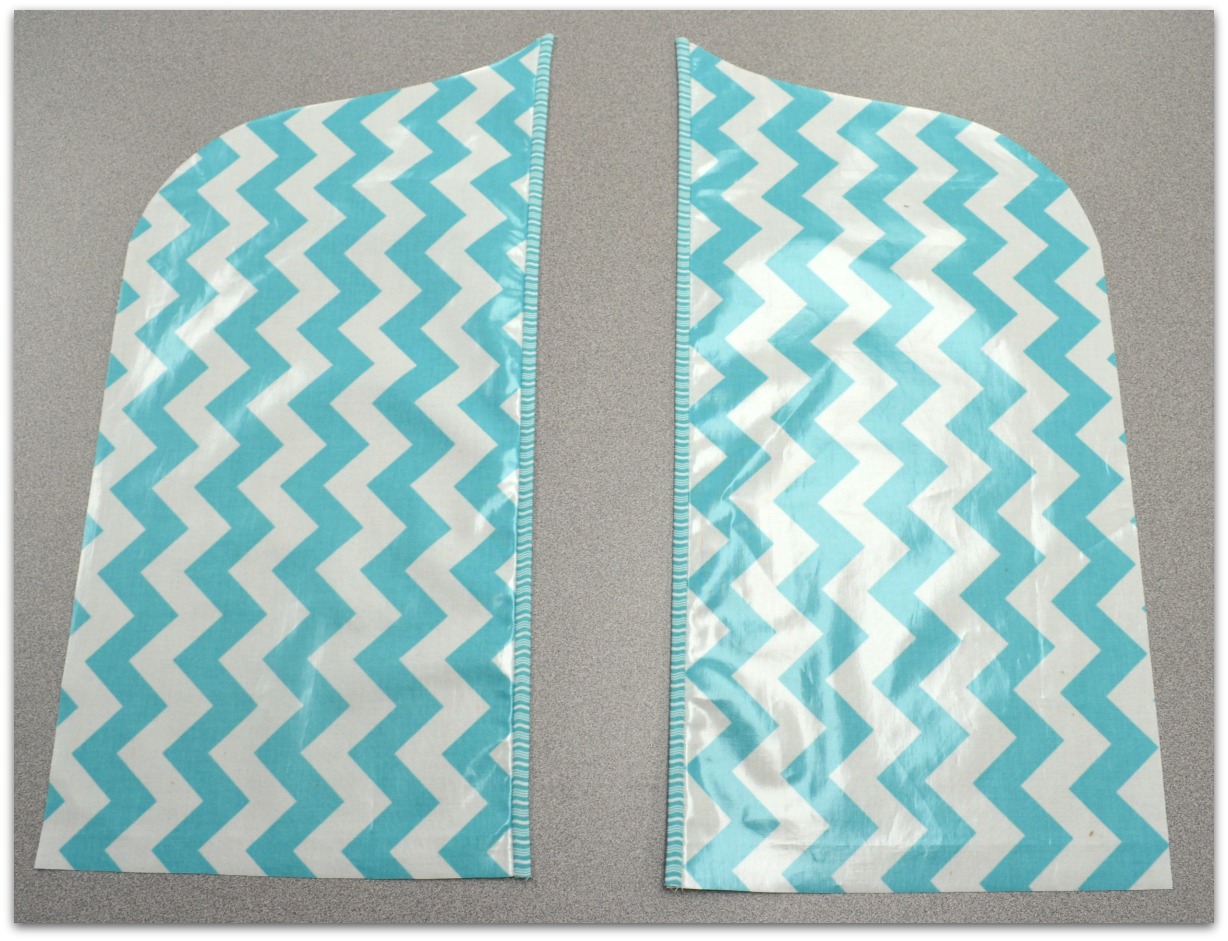
Step 3) SIDE PANELS. Trim top edges of the 9" x 22" side pieces
to match the back. Machine-bind the straight inner edges.
to match the back. Machine-bind the straight inner edges.
Apply binding strips to laminate side, using 1/4" seam allowance.
Fold binding to back and "stitch in the ditch" to finish.
Fold binding to back and "stitch in the ditch" to finish.

Pin or baste side panels in place, overlapping center section.

Step 4) POCKETS. Measure up from the bottom about 8 inches, mark a line
then stitch from the outside edge to the binding; backstitch at the end.
Repeat at another 8" width as pictured, then pivot alongside
the binding edge and stitch in the ditch to the upper edge.
Repeat to create pockets on the other side.
then stitch from the outside edge to the binding; backstitch at the end.
Repeat at another 8" width as pictured, then pivot alongside
the binding edge and stitch in the ditch to the upper edge.
Repeat to create pockets on the other side.

Step 5) BINDING, CLOSURE. Apply binding around
the outer edges by machine, as before.
the outer edges by machine, as before.

Stitch a strip of Velcro (the soft loop section) at the top inside edge.

Step 6) GO! Fill the pockets with diapers, a small packet of diaper wipes,
baby lotion, powder, goggles, nose plugs, clothes pins,"Poo-Pouri", etc. ;)
baby lotion, powder, goggles, nose plugs, clothes pins,"Poo-Pouri", etc. ;)

Fold sides over center,


Fold the bottom up,

Fold flap down to determine where to stitch
the corresponding Velcro section, then stitch it long-ways,
so if it's more or less bulky it may still be secured.
the corresponding Velcro section, then stitch it long-ways,
so if it's more or less bulky it may still be secured.
Ready to Go!

A little sweetness for those on-the-go diaper-changing (life-changing) experiences! Now, just a couple more "pink" ones, and I'll be set!
For more gift ideas and laminate projects, please visit my Snippets page.
Happy sewing!
For more gift ideas and laminate projects, please visit my Snippets page.
Happy sewing!


That's a great idea - so practical and pretty!!
ReplyDeleteGenius!
ReplyDelete