 |
| Love Birds by My Mind's Eye for Riley Blake Designs |
Let's have some fun today, exploring a few fun options "to put on" some quilty ♥s! Oh, and by the way, Happy Valentine's Day!
Supplies:
- Sewing Machine, basic sewing kit
- Background fabric
- Fabric for appliqué piece(s)
- Paper scissors
- Good fabric-cutting scissors
- Matching thread

(Also helpful:)
- Freezer Paper
- Fusible Web
- Spray Starch or Starch Powder
- Spray Adhesive
- Glue Stick or other fabric glue
- Mylar Pressing Sheet or Parchment Paper
- Stiff bristle brush
1) Choose a Pattern:
Find a pattern you like, or draw one. Click HERE to download I ♥ Applique' template.

2) Prepare the Shape
** FUSIBLE WEB: (Lite Steam a Seam II, Heat n Bond Lite, Wonder Under, etc.) Make sure you pick a product that states “sewable.”
Pros: Depending on the brand, gives a nice clean, bonded edge to the shape. Once pressed to foundation, is not easily moved. Cons: Cannot be moved without leaving residue. Can gum up the needle, if "sewable" product not used. Can give a heavy, plastic-y feel to the appliqué shape (again depends on the brand). Cost: Minimal for 12” to 17” product in sheets, packages, or by the yard.
Here are a few more OPTIONS:
** CUT OUT: Simply cut out a piece of fabric in the design you like.
Pros: Fabric is flexible, and may be repositioned any number of times. Best results for frayed-edge appliqué. Cons: Edges may fray, piece may slip, fabric may stretch or pucker when stitched.
** STARCH METHOD: Starch your fabric stiff as a piece of cardstock, then cut out the design.

Make a batch of liquid starch from powder (follow manufacturer’s directions), soak your fabric until saturated, squeeze out excess, then hang to dry or press with your iron to dry out. Use a towel to absorb excess starch as you press, then throw the towel in the wash when done. You may also use spray starch, spraying/pressing multiple times to get the desired stiffness.
Pros: Appliqué pieces hold shape, and may be repositioned. Washes out completely. Very cost effective.
Cons: Time consuming to prepare and starch fabrics.
3) Apply to Foundation
Once your appliqué is cut out, center/position the piece where you want it to be. If applying to a quilt block, cut out the block slightly larger than your finished size. Example: For a finished size block of 9”, cut out blocks at 9-3/4” to be trimmed down after stitching.
Fold your foundation fabric into quarters, lightly crease to form lines for placement.
If you’ve used FUSIBLE WEB, you’ll press the appliqué into place. Use a Mylar pressing sheet, or a piece of Parchment Liner (from the kitchen) to protect your ironing board from sticky residue.
You may also use PINS, GLUE STICK or other fabric glue products to keep appliqué in place until you can stitch it down permanently.
Use a GLUE STICK or other temporary glue to position the applique piece in place. A SPRAY ADHESIVE such as 3M's 505 Temporary Basting Spray can also work well. Following manufacturer’s directions, lightly spray the back of appliqué pieces with a bit of fabric adhesive to adhere pieces to the foundation fabric.
Pros: May be repositioned. Keeps appliqué pieces in place temporarily.
Cons: Need to spray outside or somewhere with good ventilation. Overexposure/fumes may cause side effects. Can overspray. A bit more pricey than other options.
4) Machine-Stitch Applique' Techniques
** STRAIGHT STITCH: (Edge Stitch)
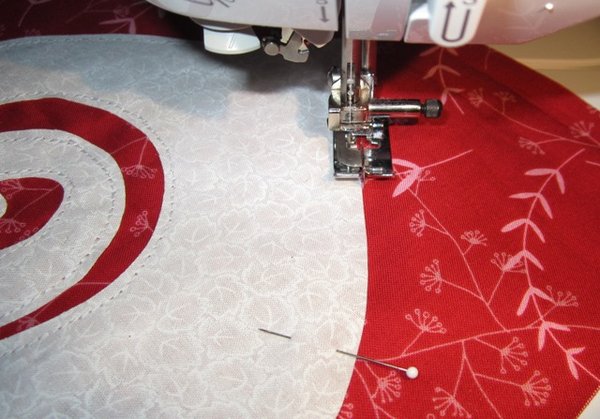
For an Edge-Stitch, sew about 1/8-inch from the raw edge of your appliqué. Try using a Blind Hem foot, with a guide in the middle of the foot which follows the edge of the appliqué. Move your sewing machine needle position to the right or left as far as the foot allows. Produces a consistent stitching line from the edge of your piece, but can be tricky on curves.

Starched - Pinned - Edge-Stitched

** STRAIGHT STITCH: (Rag-Edge)
For that wonderful shabby look, stitch 1/4” to 1/2” away from the edge of your appliqué. Use the edge of the sewing machine foot as a guide. Clip edges if desired, then brush out or wash quilt to get that homey frayed-rag look.

Cut Out - Glue Stick - Straight Stitch - Clipped
**SATIN (ZIG-ZAG) STITCH:
Stitch a zig-zag along the outside edge of your piece. Make sure the “zag” stitch goes off the appliqué, into the foundation fabric. For a satin stitch, shorten the stitch length to a smidge longer than “0” for a very finished look. Tighten the bobbin tension/loosen the upper tension so the bobbin thread does not get pulled to the top. You may need to use a stabilizer on the back so your satin stitch does not pucker. Press the shiny side of freezer paper to wrong side of fabric for an instant stabilizer.
Spray Adhesive - Satin Stitch
** BLANKET STITCH:
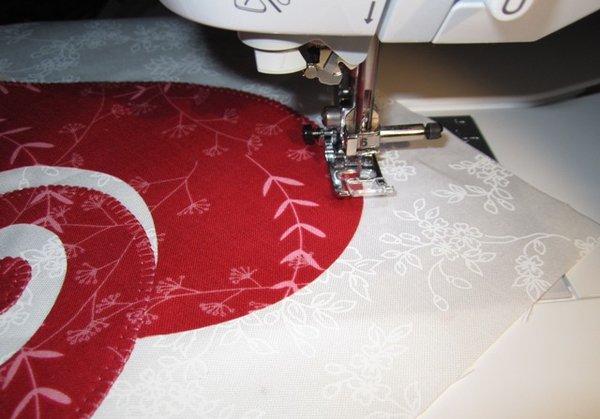
Most machines today come with an overcast or blanket stitch. Stitch a test to determine the width and length desired. For the best look, again be sure that the outline stitch goes off the edge of the appliqué piece into the foundation fabric.

Fusible Web - Blanket Stitch
And that will do it for today. Next step.. what to do with these lovelies?? Make more for a whole quilt? Possibly, but wouldn't they make great Hottie Pot Holders? That's a whole 'nother tutorial...

We will continue to explore different applique' techniques in this series. Be sure check back or Subscribe to see what's next... Meanwhile,
Happy Appliquéing!!


March 13th, 2012 at 12:51 a.m.
March 14th, 2012 at 2:08 p.m.
May 26th, 2012 at 6:41 p.m.
March 14th, 2013 at 10:13 a.m.
March 27th, 2013 at 10:27 p.m.
April 14th, 2013 at 11:04 a.m.
August 15th, 2013 at 8:59 a.m.
November 11th, 2014 at 8:47 p.m.
February 06th, 2015 at 2 p.m.
February 07th, 2015 at 6:43 a.m.