Ever wonder how quilters get those intricate little pieces appliquéd onto quilts? Today's lesson may help to solve some of the mystery, and maybe give some clues for practical, portable, everyday quilting techniques.
We've explored several ways to "apply" fabric shapes in our quilting: raw edge, turned-edge, even chenille appliqué. Today's tutorial takes us to the very traditional method of back-basting or what's often referred to as "needle-turn" appliqué.
Supplies:Fabric, needle, thread. A few other incidentals. That's it, nothing fancy. Not even a sewing machine. Don't you love it already?

Hand needles. I like to use a crewel embroidery needle with a large eye for basting. I use a smaller hand-quilting needle for the actual appliqué.
Thread. One spool of thick quilting thread in a NON-matching color
One spool of fine thread that matches your appliqué piece
One spool of fine thread that matches your appliqué piece
Fabric. A piece of backing, and fabric for your appliqué shape(s).
Thimble. I find thimbles a bit cumbersome, but a little round leather ThimblePad works great for me!
Oh, and Scissors. You can use fancy appliqué scissors that have a guard so that you don't snip your background fabric... or just be careful with a small pair of very sharp scissors.
And for me, a nice bright light and my specs so these old eyes can see what I'm doing.
InstructionsNeedle Turn (Back Basting) Appliqué
1) Center and trace pattern in reverse on WRONG side of background piece.

2) Lay appliqué fabric right side up on right side of background piece. Check to make sure that the appliqué piece covers the traced lines with at least 1/4" margin. Pin or in place.
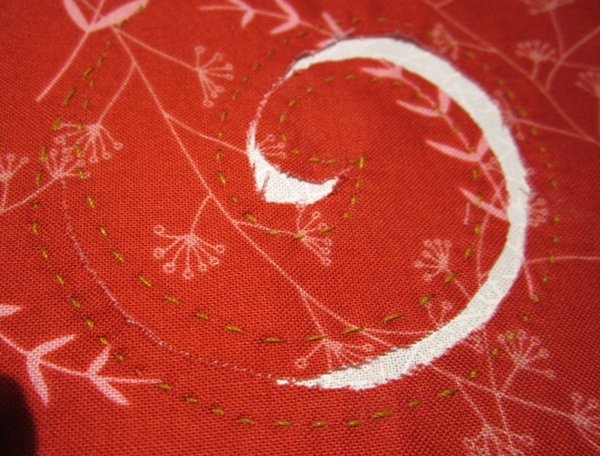
3) Thread a needle with thick quilting thread, knot one end if desired, or leave a tail. You will be removing these stitches as you appliqué.
Working from the back, baste the two pieces together with a running stitch. This will eventually become the fold line of the applique piece, so it is important to take small stitches - not miniscule, but small enough (around 1/8" stitches) to help perforate the fabric for smoother curves.

4) Trim the applique' piece to a scant 1/4" from basting stitches.


5) Working on about a 1/2-inch section at a time, snip the basting stitches and push the seam allowance under with the tip of the needle, (hence the name "Needle-Turn"). Stitch the appliqué edges down, using about 1/8" stitches.

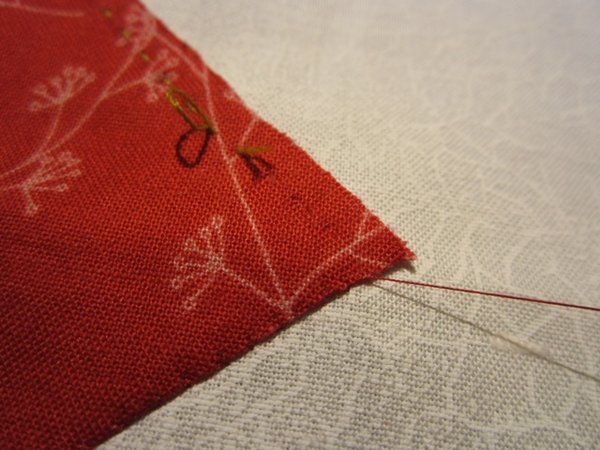
Use a single thread and knot the end. Bring the needle out through the newly-folded edge, then take it straight into the background fabric. Travel 1/8" through the background and bring the needle out the folded edge for the next stitch. Your thumbnail will hold it in place as you stitch. Continue stitching around the appliqué piece in this manner; snip and remove basting, turn the seam allowance under, then stitch. Every few stitches, give a gentle tug to the thread to bring it snug with the background without puckering the fabric.
6) Outside points. Fold one side of your corner all the way to the end of the fabric piece and stitch to the point. Take an extra stitch in place. Tuck the other side under and scoot any remaining fabric underneath and continue to stitch.

7) Inside points. Clip seam allowance nearly to stitching line, but leave enough fabric for a needle to go through. Take an extra stitch in place, then continue to stitch.
8) Layering. If you are appliquéing a design that requires layering your pieces, such as stems with leaves, flowers, a flower center - begin with the piece that is the furthest from the top. Example: Stem, then leaves, then flower petals, then flower center.
9) Tie off. To end stitching without lumpy knots, make three tiny whip stitches in background fabric to secure, then trim thread.

10) Press, and your appliqué is finished!

The perfect portable project! Now just a few more blocks from last month's tutorial, and I'll have enough for a quilt! (Maybe by next Valentine's Day!)
This completes the "I ♥ Appliqué" tutorial series. These and other step-by-step Quilting Basics pictorials may be found HERE. And I'd love for you to subscribe here at Quiltscapes for more quilting adventures!


July 09th, 2012 at 2:54 p.m.
July 09th, 2012 at 10:11 p.m.