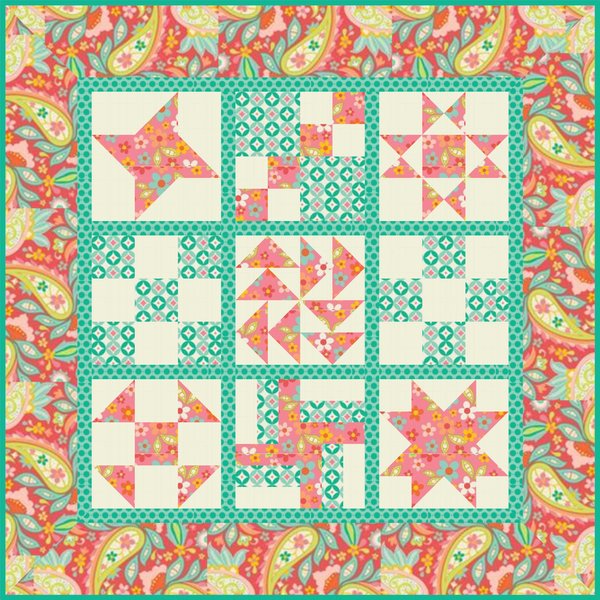
So happy to have you join me for today's Cutting Corners College Tutorial #5 for Riley Blake Designs! This is the first lesson in a series of "Building Blocks" tutorials;
multiple ways to make the basic quilt units used in nearly every pieced quilt!
multiple ways to make the basic quilt units used in nearly every pieced quilt!
 |
| "Pieceful Beginnings" 42" x 42" Quilt-Along Sampler featuring Sweet Nothings fabric by Heidi Staples for Riley Blake Designs |
- New to quilting?
- Want to try some quick, fun techniques?
- Want to perfect your awesome skills?
Over the next three months, we’ll explore basic quilt blocks used in nearly every pieced quilt. Gather a few of your favorite fabrics, follow along and you’ll have enough blocks to make a fabulous quilt! Later we’ll follow up with “Finishing School” lessons on setting, sashing, borders and how to “grow” your quilt to any size you’d like. Are you ready??
Let's Quilt!
Let's Quilt!
SUPPLIES:
Please refer to "Tips, Tricks & Tools" for information on assembling a basic sewing kit, etc.
Please refer to "Tips, Tricks & Tools" for information on assembling a basic sewing kit, etc.
Yardage Requirements:
Print #A ............................... 3/8 yard
Coordinating Print #B ...... 1 Fat Quarter (18” x 21”)
Background #C .................. 1/2 yard
Inner Border #D ................. 3/8 yard
Outer Print #E ................... 3/4 yard
Binding ............................... 1/4 yard
Backing ............................... 1-1/8 yards
INSTRUCTIONS:
Lesson I: SQUARES
Anyone can cut squares and sew them together into a four patch. But I've got some fun "twists" to try today! A little bit of fabric and a few minutes will yield great results!
Here is a link to my Flickr set with detailed step-by-step cutting and stitching instructions. It will take us through some simple steps using squares, strips, and sometimes even sewing "inside out"! You'll ♥ it! View as a slideshow, or click on each picture for the details. Cut lists for each of the blocks are below.
Here is a link to my Flickr set with detailed step-by-step cutting and stitching instructions. It will take us through some simple steps using squares, strips, and sometimes even sewing "inside out"! You'll ♥ it! View as a slideshow, or click on each picture for the details. Cut lists for each of the blocks are below.
IMPORTANT: Because sampler blocks may have a differing number of seams in each block, it's important to sew with consistent, accurate 1/4" seam allowance. Make sure to include the stitches when you measure your seam allowance. See last month's lesson for more ideas and to learn about the MAGIC TWIST.
Double 4-Patch

CUT LIST: Fabric A (small squares): one 2-3/4" x 12" strip (slides 3-9)
OR one 5-1/2" square (slides 10-17)
Coordinating print B (large squares): two 5" squares
Background print C (small squares: one 2-3/4" x 12" strip
OR one 5-1/2" square
Sew together (slides 18-22)
Rail Fence

CUT LIST: Fabric A: one 2" x 21" strip
Coordinating Print B: one 2" x 21" strip
Background Print C: one 2" x 21" strip
(slides 23-29)

CUT LIST: Fabric A: one 2" x 21" strip
Coordinating Print B: one 2" x 21" strip
Background Print C: one 2" x 21" strip
(slides 23-29)
Instant Magic 9-Patches
CUT LIST: Coordinating Print B: one 10-1/2" square
Background Print C: one 10-1/2" square
(slides 30-42)

CUT LIST: Coordinating Print B: one 10-1/2" square
Background Print C: one 10-1/2" square
(slides 30-42)
Each of these blocks and methods can be used for an entire quilt. Next Month: TRIANGLES. Hope you had fun trying some of these techniques! If you have any questions, please post a comment or send an email. I'm always happy to answer!
Happy Quilting!
Happy Quilting!


No comments:
Post a Comment
So happy you stopped by for a visit! Thank you!