Featuring Riley Blake Designs "Sweet Nothings" by Zoe Pearn
You've made your blocks, planned your fabulous design, now let's put it together, STEP by STEP!
COURSE SUPPLIES:*Nine 9-1/2" (unfinished size) Building Blocks quilt blocks
Two more sets of Instant 9-Patch blocks I - Squares
Twelve 9-1/2" Quarter-Square Triangle blocks II - Triangles
Note:If you are just joining us, you can
get started here ↓ to assemble a basic sewing kit.
Tips, Tricks & Tools
Instructions for basic pieced blocks here → Building Blocks
COURSE INSTRUCTIONS:
Step 1) MAKE a few more blocks!
9-Patch blocks: Instructions HERE → I - Squares
Two ~ 10-1/2" (pink) print squares
Two ~ 10-1/2" background squares
9-Patch blocks: Instructions HERE → I - Squares
Two ~ 10-1/2" (pink) print squares
Two ~ 10-1/2" background squares
QST Blocks: Instructions HERE → II - Triangles
6 ~ 10-1/4" (dark bluegreen) print squares
6 ~ 10-1/4" contrast or coordinating print squares
Step 2) TRIM all blocks to 9-1/2" square (unfinished size)
(In a perfect world, that is. Trim all blocks to a reasonably consistent size.)
6 ~ 10-1/4" (dark bluegreen) print squares
6 ~ 10-1/4" contrast or coordinating print squares
Step 2) TRIM all blocks to 9-1/2" square (unfinished size)
(In a perfect world, that is. Trim all blocks to a reasonably consistent size.)
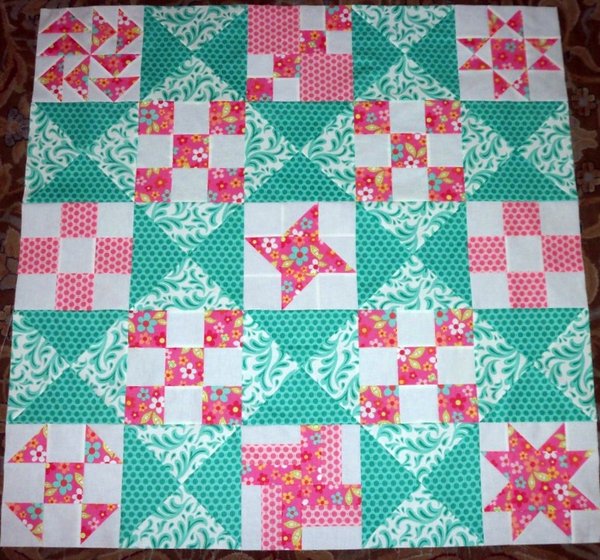
Step 3) LAY OUT blocks as diagrammed (like my design wall/floor?)
Step 4) Working in columns, FOLD the 2nd and 4th column
of blocks right sides together over the 1st and 3rd columns of blocks.
of blocks right sides together over the 1st and 3rd columns of blocks.
Step 5) PIN at upper right hand corner, to know where
to begin stitching seam together. PIN while blocks are in place, rather than picking them up first. (Unless you really like using your seam ripper. It's so easy for the pair of blocks to "change sides" on the way to the sewing machine, and get sewn along the wrong side. If you always pin in the upper corner, while the block is in place, it is ready to go in the sewing machine when you pick it up.)
to begin stitching seam together. PIN while blocks are in place, rather than picking them up first. (Unless you really like using your seam ripper. It's so easy for the pair of blocks to "change sides" on the way to the sewing machine, and get sewn along the wrong side. If you always pin in the upper corner, while the block is in place, it is ready to go in the sewing machine when you pick it up.)

Step 6) STACK pairs in column one together, top to bottom.
STACK second column from top to bottom, also.
STACK second column from top to bottom, also.
Step 7) LAY stacks of each column on your lap, ready to CHAIN PIECE,
with pins to the upper right of each stack.
with pins to the upper right of each stack.
Step 8) CHAIN PIECE each column of blocks,
using a 1/4" seam allowance.
Begin with the set on top of the stack and PIN remaining
side of each block before stitching, to match edges.
When you come to the bottom of that seam,
take a few stitches and SLIDE the next pinned set of blocks
under the presser foot. STITCH, removing pins as you get to them.
Continue to the end of stack one; clip beginning
and ending threads. Leave the "chains" in place.
Saves TIME and THREAD!
NOTE: You may wish to MARK the first block at the top
of column ONE with one pin; mark the first block
of column TWO with two pins to keep columns organized.
Step 9) LAY OUT columns of blocks in order again.
Step 10) LAY single remaining blocks in the last column, right sides together over the middle column. PIN the pairs in place as before, in the top right-hand corners. Beginning with the top sets, fold each set of blocks back and forth to stack, keeping the "chains" intact, then take the stack to your sewing machine.

Step 11) STITCH as before, using 1/4" seam allowance.
PIN each set of blocks together then CHAIN PIECE.
Step 12) LAY OUT to make sure design is correct, then repeat
the procedure of folding the right column of blocks
over the left column of blocks.
PIN each set of blocks together then CHAIN PIECE.
Step 12) LAY OUT to make sure design is correct, then repeat
the procedure of folding the right column of blocks
over the left column of blocks.
Step 13) PIN in place, then fold the stack accordian-like
to take it to the sewing machine and again CHAIN PIECE
to STITCH the final vertical column seam.
to take it to the sewing machine and again CHAIN PIECE
to STITCH the final vertical column seam.
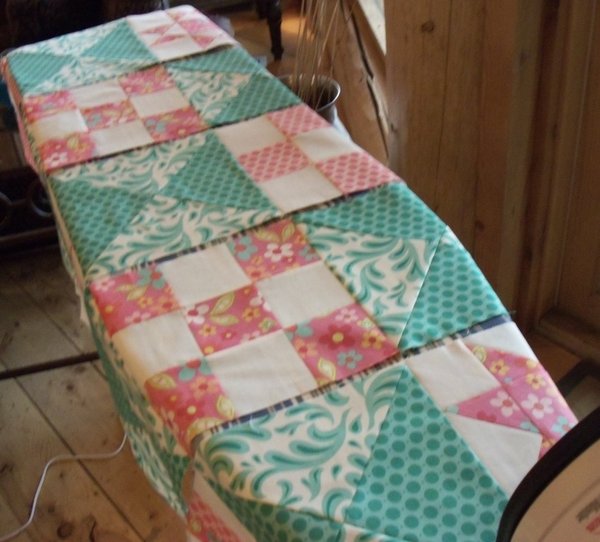
Step 14) Take your "chained together" quilt top to the ironing
board to PRESS all at once, in preparation
for sewing the horizontal seams.
a) PRESS seams FLAT
board to PRESS all at once, in preparation
for sewing the horizontal seams.
a) PRESS seams FLAT

b) PRESS seams from printed side for a crisper fold.

c) PRESS each seam toward Quarter-Square Triangle blocks (green).


Step 15) LAY OUT "chained" quilt top.
CLOSEUP of thread chains

Step 16) Working on one row at a time, working from right to left,
FOLD one row of blocks right sides together over adjacent blocks.

Step 17) PIN each horizontal row, matching seams
to alternate/nestle seam allowances.
This should work perfectly since we pressed toward the bluegreen on each row.
STITCH using a 1/4" seam allowance as before.
Step 18) PRESS your quilt top seams flat, then press seams
in a consistent direction, avoiding any twisting.
Here's the finished quilt top - all ready for borders!!

NEXT month we'll tackle border treatments and
finish our quilt top with a fantastic mitered border.
You may have noticed that I have found a happy place for my ODC tendencies. :) These series of Quilting Basics have been geared to more structured/traditional/basic quilting pointers and tips for you to use/fall back on. If you like pointy points, intersections that match and quilts that lie flat,
~~ REMEMBER these TIPS ~~
Accuracy begins with the basics:
♦ Use an accurate 1/4" seam allowance
(include stitches when measuring 1/4").
♦ Alternate seam allowances to reduce bulk.
♦ Press seams toward the darker fabric
whenever possible, using a hot, dry iron.
♦ After pressing, re-trim each pieced unit
exactly to required measurement.
♦ Sew slowly and keep control.
♦ Be willing to try new things, test your
creativity, and enjoy yourself!

Comments
- Wow! It's a long and hard process but very rewarding when you finished it. proactol plusby Esther FolleyApril 25th, 2012 at 8 a.m.


4 comments:
I'm a new follower. Thanks so much for the cute pattern. Love it. I have to make it soon.
ReplyDeleteGreat chickens! Love your quilts!
ReplyDeleteThank you for a great tutorial. I'm following Deone now. I am not a "chicken lover" per se, but love seeing them here. I might just have to start a new collection!
ReplyDeleteOops, thought I was leaving this on Sew We Quilt! Wonder what site I left YOUR comment on!!!?
ReplyDeleteSo happy you stopped by for a visit! Thank you!