Search This Blog

Showing posts sorted by relevance for query bias binding. Sort by date Show all posts

Monday, May 4, 2015

Fancy Finishes: Curvaceous Binding! (+ Bias Binding Tutorial)

There are times when a quilt calls for a fancy, curvy edge!

Fabric:  "Romancing the Past" by Sue Daley for Penny Rose Fabrics,
a division of Riley Blake Designs

Here's a little tutorial about how to achieve long, smooth curves when applying binding to a curved border. 

Prepare the Quilt
Now, sometimes all a quilt needs is a little curve around the corners.  I like to add a little dip after the curve, not much, about a 1/2" dip, with straight binding in between.  It somehow frames the quilt without a whole lot of effort, and looks so sweet!  


First, MARK your desired curves using a removable marking pen.  My favorite is an iron-off Pilot Frixion pen.  Use a circle template/ruler or grab a bowl, plate or pan lid to mark the curves.  

You can get really scientific about it, calculating the length of the border, then dividing by the number of curves or scallops so they're all distributed equally, or simply start from the corners and work your way to the center.  You can smooth out the curves or bring them to an inner point for scallops.  OR you can simply follow the print of the fabric, as pictured below:

↑↑ Check out that perfectly curvy shadow!

In this case, I fussy-cut and pieced the border fabric, then centered each border on the quilt and mitered the corners (<< click to see tutorial).  

Be sure to MARK the scallops or curves on the quilt prior to quilting.  Then, BASTE the quilt right on the marked lines.  Once quilted, TRIM the quilt a scant 1/4" from the marked/basted line.  Now you're ready to bind!

Prepare French Double-Fold Bias Binding
Determine the amount of fabric needed for your quilt.  I use a minimum of 5/8 yard, which produces 30" strips when cut on the bias, and yields enough bias binding for a full size quilt. If my quilt is smaller, I'll just save the extra for another project.  

Here's a chart for yardage needed to produce 2" binding strips.  Any larger than 2" strips for the binding will make it a little more "klunky" - that is, less smooth around the curves.

BIAS BINDING YARDAGE CHART
Crib size (40 x 54")      1/3 yard
Twin (63 x 87")           1/2 yard
Full ( 78 x 87")            5/8 yard
Queen (84 x 92")         3/4 yard
King (100 x 102")         7/8 yard
Note: 5/8 yard will produce fifteen 2" wide x 30" long strips.  That's about 450 linear inches of binding yardage!

Prepare your binding as indicated in this Bias Binding Tutorial.
First, TRIM off selvages and SQUARE UP binding yardage.
1)  Lay out fabric wrong side up, selvage edges at the sides.  FOLD left corner up to the top edge at a 45-degree angle.  Allow selvage edge to overhang by about 5/8".  Finger press to crease.


2)  CUT on folded line
3)  Unfold the cut triangle and MOVE the piece to the opposite end of fabric.  PIN selvage edges, right sides together.


4)  STITCH using a 1/4" seam allowance.  PRESS seam open.  Your binding piece should now resemble a parallelogram.
5)  Next, FOLD the upper left point of fabric down along the diagonal cut edge, keeping raw edges aligned.  Repeat on the opposite side by folding the lower right point up along the diagonal edge.  Keep folding into a roll as needed to fit on your cutting mat.


6)  ROTATE and ALIGN the folded roll along a horizontal line on your cutting mat. TRIM end evenly, then SLICE into 2" segments.


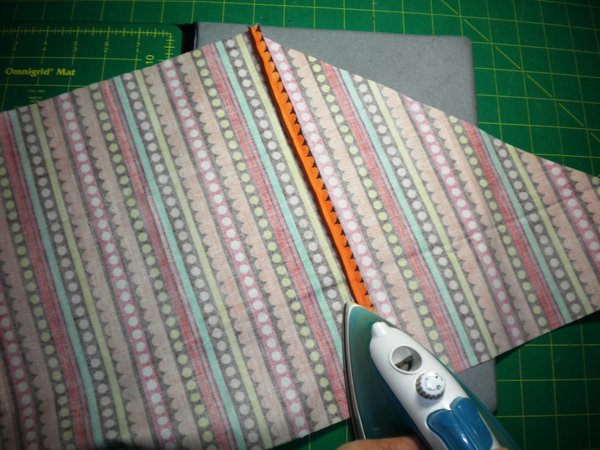
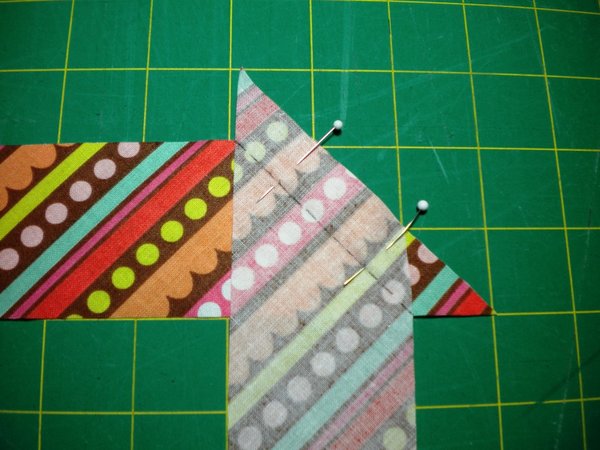
7)  JOIN strips right sides together, end to end, and STITCH from valley to valley as pictured.  A diagonal seam will help to distribute the bulk and reduce lumps in your binding. :)
8)  TRIM seams to a scant 1/4”; PRESS seams open.  PRESS binding in half, lengthwise, then fold to store until needed.  See video HERE.

9) STITCH binding to the quilt front, aligning raw edges together.  For best results, stretch the binding slightly on inner curves, and ease around outer curves.  Use a stiletto or your fingers to help ease the binding under the needle, especially around tight curves.

Ease around the outer curves
10)  JOIN binding ends together with a final diagonal seam.  It works best if you pick a gentle slope to create that final mitered seam.  TRIM (yes, I use pinking shears to help reduce even more bulk), PRESS seam open, then refold and continue stitching, overlapping the beginning stitches.

Miter the final seam for a continuous binding
11)  FOLD binding around to the quilt back, then HAND-STITCH to finish, matching thread with the binding.

Hand-stitched finish

Fabulous!
Pattern is now available on my Etsy store!  ↑ Click for the link.  Want to be notified of more "Quiltscapades"?  Subscribe via email (sidebar), follow Quiltscapes on facebook, or send an email (deonn@quiltscapesqs.com).
 
P.S.  Here are a few links referenced in this tutorial:
Bias Binding (video)

Binding Basics (final mitered seam)
Binding Storage (video)
Mitered Borders Tutorial

Tuesday, April 12, 2011

I May Be "Biased"...

Thank you for joining me for this "Cutting Corners" tutorial for Riley Blake Designs!   Learn some terrific tips for cutting and using Bias Binding!  Plus, bonus instructions to make your own Bias Tape!


Here is my favorite "cinnamon roll" method to make bias strips. 
Use whenever you need to bind a curve on any unfinished edge: quilt, jacket,
armhole, apron, or make your own bias tape.

COURSE SUPPLIES for QUILT BINDING:  
  • Rotary Cutting Supplies:  Mat, Ruler, Rotary Blade
  • Fabric:   Binding gives a defining edge to your quilt or garment.  I recommend using tone on tone, solids, or small motif, check, stripe or plaid.   Basically, avoid large prints, extremely wide stripes or florals for best results.
    BIAS BINDING YARDAGE CHART
    Crib size (40 x 54")     1/3 yard
    Twin (63 x 87")           1/2 yard
    Full ( 78 x 87")            5/8 yard
    Queen (84 x 92")         3/4 yard
    King (100 x 102")         7/8 yard
Note: 5/8 yard will produce fifteen 2" wide x 30" long strips.  That's 450 linear inches of binding yardage!


INSTRUCTIONS:  
1)  SQUARE UP fabric perpendicular to the selvage edge.  FOLD fabric in half and match up selvages.  ALIGN the fold of your binding fabric along a line on your cutting mat.  TRIM cut edges.

square up fabric 

2)  LAY OUT fabric, wrong side up.  FOLD left corner up to cut edge at a 45-degree angle.  Allow selvage edge to overhang by about 5/8".  PRESS, or finger-press to crease.

fold at 45o angle, finger press

3)  CUT on folded line.

cut on 45o folded line

4)  MOVE cut piece to opposite end of fabric; PIN selvage edges, right sides together. 

move cut piece to opposite end 

5)  STITCH using about a 5/8" seam allowance, enough to trim off selvages.  TRIM seam, PRESS seam open.

stitch, trim, press seam open

6)  FOLD your parallelogram in half, then FOLD point of fabric down along cut edge, keeping fabric even.  Keep folding into a roll as needed to fit on your cutting mat.

fold in half, lining up cut edges 

fold and align cut edges

7)  ALIGN folded roll along a horizontal line on your cutting mat.

align horizontally

    8)  TRIM end, then SLICE into 2" strips.

slice into 2" segments 

8)  JOIN strips right sides together, end to end, and STITCH from valley to valley.  Because you squared up your fabric at first, you should have 45-degree angles on the ends of your strips.

stitch from valley to valley

9)  TRIM seams, PRESS seams open.

press seams open

10)  PRESS binding in half lengthwise.

press in half, lengthwise

11)  FOLD pressed binding into a figure eight, tuck ends and store until needed.  See video:

 12)  PULL binding from the middle to use without getting twisted or tangled.

tangle-free binding


TIP:  For best results when applying binding to curves, stretch it a little on inner curves, and ease around outer curves.  Beautiful!

curved corners

For more binding information and application, see my BINDING BASICS tutorial.


~~~

MAKE YOUR OWN BIAS TAPE:

Use the same method as above to cut strips to make bias tape.  There are lots of bias tape-maker gizmos and gadgets on the market,  but here is a tried and true do-at-home method to make your bias strips any size you'd like.


make your own bias tape

1)  CUT your bias strips. 
     For example:  1" bias strips = 1/2" finished flat bias, or 1/4" folded bias tape.


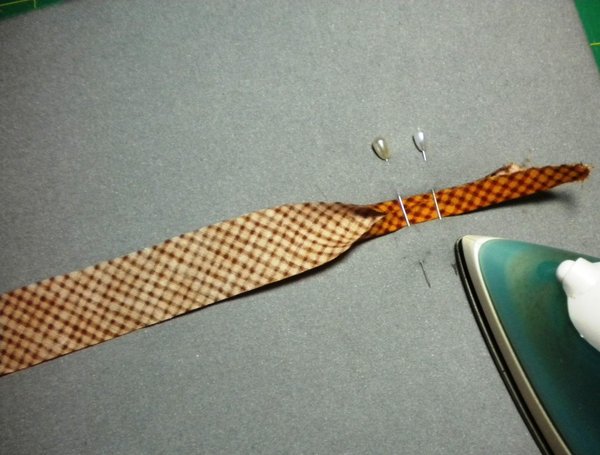
2)  Place a PIN through your ironing board cover leaving a space as wide as you'd like the finished size.  Add a second pin to the side, with enough space for the tip of the iron to press.  The fabric should be about twice the width of that space.

3)  STARCH bias strips, then PRESS as you gently pull the strips between the pins, being careful to keep your edges folded.

Use to create vines for applique, to bind seams, or use for other decor.
Hope you learned some fun tips in this tutorial!  If you have questions, please leave a comment or email a note I'd love to hear from you!  


Comments from RBD 


  1. So clever!! Thanks so much for the tip! Found you on Pinterest. :)
    by Jeni
    August 04th, 2012 at 9:31 a.m.
  2. I just love all your short cuts & ideas...it really saves alot of time when you have great ideas like yours. I have not been sewing for years,but I found you on you tube, and have been following you ever since.I have made your UFO & your wrist pin cushion... and I am going to do a quilt next..just brushing up on my skills..I have never made a quilt,I've made some pillows, now I have to be brave & take that next big step...Hoping my old machine will pull me thru...
    by Jenny
    August 05th, 2013 at 4:32 a.m.
  3. You are amazing. Thank you for sharing your talents. I just purchased the tree skirt on Craftsy and have others of your terrific patterns. I'll be watching for more and I know I will be pleased with anything you share. The tips on bias tape binding is very much appreciated. You make it so clear that I actually feel like I can do it.
    by Betty
    November 30th, 2013 at 9:01 a.m.

Monday, February 14, 2022

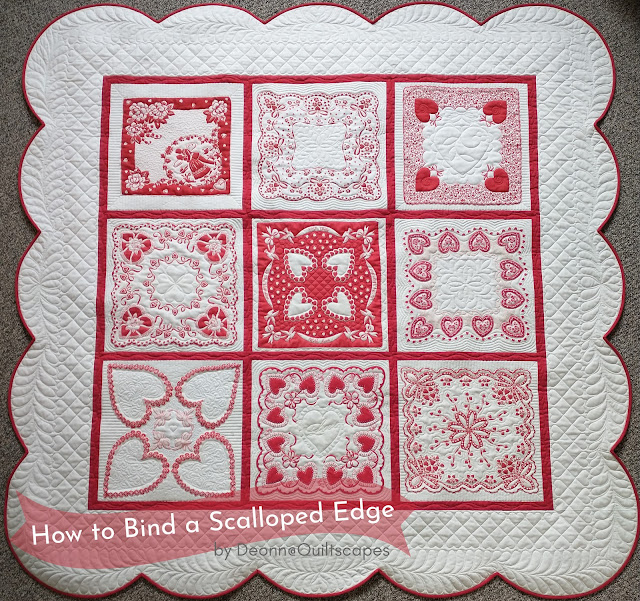
Tutorial ~ How to Bind a Scalloped Edge

Love is in the air!  This "LOVE-ly" gorgeous quilt was made with vintage Valentine handkerchiefs by my quilt customer, Shawn T.  She always has wonderful, creative ideas, and this was no exception!  

Monday, August 3, 2015

Fancy Finishes: Odd Angles - the Ins and Outs!

A few good tricks to remember for those quilts with a little something extra!


Have I told you that I love binding a quilt?  I do!  I usually stitch my double-fold binding to the front of the quilt, then hand-stitch to the back.  One of my favorite things about quilting is to sit with my feet propped,  put on a good movie as I hand-stitch, think about the recipient of the quilt, infuse a little more of myself into the quilt (sometimes blood, sweat and tears), and then it's done!  I've finished my creation and it can go out in to the world and serve it's purpose. And yes, my quilts are like my children.

Like all children, each quilt is unique - and some are more "special" than others, requiring a bit of effort and creativity in their rearing.

The following tree skirts' edges have all sorts of angles - including sharp points and gentle slopes, odd-angled both inner and outer corners.  (Isn't it time to start thinking Christmas?)
Star Medallion Tree Skirt by Deonn

First, let's tackle those odd OUTER ANGLES.  I generally use 2" strips, joined and folded in half lengthwise, raw edges aligned, stitched with 1/4" seam allowance.

Insert a pin to mark a seam-allowance-distance away from the next edge;
the same width you are using to apply the binding.  Mark each corner.
Stitch binding to the quilt and stop just before the pin.  
Backstitch a couple of stitches and remove quilt from the machine to clip threads.  

The first step is pretty much the same as any square corner with a 90-degree angle.  See the basic binding tutorial HERE.  Next is the tricky part:  creating those mitered corners.  Pivot the quilt so the next edge is to your right.  
Here's the trick:  Fold the binding up so as to create a straight line,
continuing from the quilt's edge.

 Next, fold the binding back down, aligning raw edges of the binding
 with the quilt edge. Place the quilt back under the needle and continue
 stitching, repeating the mitering process at each corner.


Once the binding is stitched to the quilt, give a light press or finger press the binding so it will fold back right at the stitching lines.

Now, take a little time to pin or clip the binding corners in place,
forming identical miters on the back side, ready to hand-stitch!

If you wish, you can stitch the miters down as you bind the quilt.

Beautiful!
Pattern: Star Medallion Tree Skirt version #2:  Peppermint Candy by Deonn  -
  Fabric: Lost & Found Chritsmas by My Mind's Eye for Riley Blake Designs

No matter how sharp or wide or odd the angle, the trick is the same.  Here's a look at the 45-degree corner finish:

 Insert a pin to mark a seam-allowance-distance away from the next edge;
Stitch binding to the quilt and stop just before the pin.  
Backstitch a couple of stitches and remove quilt from the machine to clip threads.  

 Fold the binding up so as to create a straight line,
continuing from the quilt's edge.

 Fold the binding back down, aligning raw edges of the binding
 with the next edge.

 Place the quilt back under the needle and continue stitching.
Fold binding to the back, forming identical miters.
You may need to fiddle a little bit to tuck in the miters.
Star Weave Tree Skirt  by Deonn 
~~~~~

Now for those INNER CORNERS.  If you have not basted the edges of the quilt, take a minute to baste or stay-stitch (garment construction term) a scant 1/4" on all inner corners. 

Here's the trick:  CLIP a scant 1/4" notch to, but not through
the inner corner basting stitches.


Insert a pin to mark the center of the clip.  Stitch binding to the quilt,
stopping at the pin, then plant the needle.

Remove the pin, take one more stitch.  With needle still down, pivot or fold the quilt
to straighten out your stitching path, then resume stitching.
   
Finish the binding as usual, mitering the outer corners and straightening out the inner corners.
Once the quilt springs back, it forms a natural miter.
If desired, stitch the inner miter closed.

Sweet!

Here's another sample of some Ins & Outs.  These on-point hexagons give a picket-fence look.
Sheep Shape pattern by Deonn, quilt made by Suzanne M.
Nice, gentle angles, in or out.


Use the same techniques above, even for gentle angles like this.  Now you're all set to tackle binding with any angle!

~~~~~~

And what of those sometimes problem-children, SCALLOPS??

Basically, it's the very same technique as above, plus stitching around curves.  Again, baste or stay-stitch a scant 1/4" at the inner points.  You must also use Bias Binding.  Check out the Curvaceous Curves tutorial HERE for a full bias binding lesson.

After basting, clip to the inner point, then insert a pin to tell you where to stop.

In addition, be sure to ease the binding around the outer edges of the scallop. 

Stitch to the pin, then plant the needle and remove the pin.
Pivot or fold the quilt to be able to continue stitching in a straight line.

The final mitered seam is a little bit tricky, since it is on a curve,
but you can do it!  Just allow a little extra ease.

And finally, fold the miter over as you press the binding to the back side.

Pin or clamp in place, then it's ready to machine- or hand-stitch to the quilt.

Quilted placemats by Deonn - Fancy Free by Lori Whitlock for Riley Blake Designs.
For more binding fun and some "Alternate Endings", as I call them, see more >> Binding Tutorials. << 

Happy Binding!