Today's RBD Cutting Corners tutorial is a comparison of several quick and practical ways to prepare appliqué pieces with turned edges prior to applying them to a quilt. And regarding the appliqué-tion of turned-edge appliqué... You may wish to hand-stitch your appliqué, however, some machine-stitches can resemble hand stitching with just as nice a result as you will see.
SUPPLIES
Before shopping for supplies, take a visit to the kitchen and around the house! You may be able to collect a few things that you already have on hand. First, if you have 'em, get out the old pinking shears! I love trimming any curved edge with pinking shears. They make perfectly symmetrical little notches for smoother curves on turned edges.
- Pinking shears
- Template material: Empty cereal boxes, cardstock, or mylar template sheets.
- Freezer paper
- Interfacing: Sew-in such as Pellon Sheerweight 905 or Featherweight 910.
Used dryer sheets can also work for smaller pieces! - Heavy Starch or several applications of a lighter starch
- Monofilament thread, 100% Polyester, not nylon. Superior Thread or Sulky brands
- Paper-cutting scissors
- Old Dishtowel
- Temporary spray adhesive such as 3M 505.
- Glue Stick
- Marking instrument
- Needle and matching thread if hand-stitching
- I ♥ Appliqué pattern - click HERE to download and print free pattern

This technique is my favorite, using cereal box cardboard. It produces nice, crisp edges which stay put until I'm ready to appliqué them to my quilt. I usually have empty cereal boxes lying around that I can use for a template. Heavy cardstock can work as well.
1) Print or trace the pattern and rough-cut out the appliqué shape. Adhere to template material with a glue stick or spray adhesive.
2) Cut out template. Take long, smooth cuts with your scissors to keep the edges smooth. The appliqué piece will only be as smooth as your cutout. If necessary, use a nail file to smooth out any rough edges.
3) Trace template in reverse on the wrong side of the fabric.
4) Trim the fabric to 1/4" seam allowance. Use pinking shears or clip the curves.
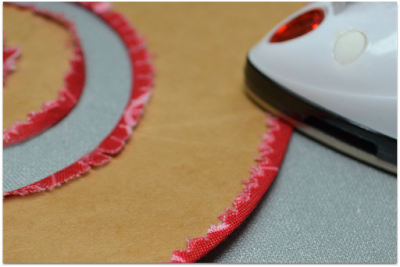
5) Layout a clean dishtowel on the ironing board. Spray heavy starch onto the edges of the fabric. Spray the starch directly onto the fabric, or spray a bit of starch into a lid until it collects a bit, then apply to fabric edges with a small paintbrush or cotton swab.
5) Anchor template with a large pin through the center so you can rotate as you press fabric edges over the template. Hold down the iron until the starch dries and the fabric holds its shape.
6) Allow to cool, then remove the template. Your appliqué piece is ready to stitch!
1) Print or trace the pattern and rough-cut out the appliqué shape. Adhere to template material with a glue stick or spray adhesive.
2) Cut out template. Take long, smooth cuts with your scissors to keep the edges smooth. The appliqué piece will only be as smooth as your cutout. If necessary, use a nail file to smooth out any rough edges.
3) Trace template in reverse on the wrong side of the fabric.
4) Trim the fabric to 1/4" seam allowance. Use pinking shears or clip the curves.
5) Layout a clean dishtowel on the ironing board. Spray heavy starch onto the edges of the fabric. Spray the starch directly onto the fabric, or spray a bit of starch into a lid until it collects a bit, then apply to fabric edges with a small paintbrush or cotton swab.
6) Allow to cool, then remove the template. Your appliqué piece is ready to stitch!
7) Position appliqué to the background using a glue stick. Press in place with an iron and the glue stick will hold the appliqué secure until you are ready to stitch.
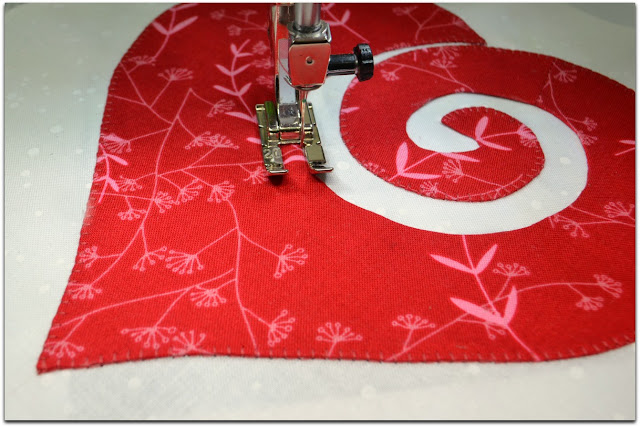
8) Hand- or Machine-stitch edges in place. I used a small buttonhole stitch with matching thread. A tiny zig-zag stitch works well also.
TIP: For machine-appliqué, thread the bobbin through that little hole in the bobbin hook (if you have one) and the bobbin thread will not show on the top.
ANOTHER TIP: Use an open-toe foot and move the needle position to the right so the appliqué edge can glide against the inside edge of the foot. This makes it easier to position the stitches.
Cardboard Template Pros: Inexpensive, cardboard is readily available. Works well to get a nice, crisp turned edge. Cons: After multiple uses, the edges may become soft or distorted.
Other Options: Mylar Template Sheets may be purchased for a bit more cost, but the mylar will not melt and the edges will remain crisp. Use the same technique as with the cardboard template technique.
~~~
II. Freezer Paper
(A) Shiny Side Down
1) Trace shape in reverse on the dull side of freezer paper, then cut out the shape. Use one layer, or iron several layers together for a stiffer template.
2) Press freezer paper template, waxy side down, on to the wrong side of the fabric. The wax will adhere to the fabric without leaving residue.
3) Continue with steps #4 through #8 above. The technique is essentially the same as with a cardboard or mylar template.
(B) Shiny Side Up
A tiny zig-zag stitch, about 1.2mm wide and 1.5mm long, resembles hand stitching. Again, use the open-toe foot with the needle positioned to the far right. This helps to keep the appliqué piece aligned, for better control of where the stitches land. The "zig" stitch goes into the background alongside the appliqué piece, and the "zag" stitch takes a little bite into the edge of the appliqué.
(A) Shiny Side Down
1) Trace shape in reverse on the dull side of freezer paper, then cut out the shape. Use one layer, or iron several layers together for a stiffer template.
2) Press freezer paper template, waxy side down, on to the wrong side of the fabric. The wax will adhere to the fabric without leaving residue.
3) Continue with steps #4 through #8 above. The technique is essentially the same as with a cardboard or mylar template.
(B) Shiny Side Up
1) Trace appliqué shape on the dull side of 1 layer of freezer paper, then cut out on the lines.
2) Use a glue stick to lightly adhere the dull side of freezer paper to the wrong side of the fabric.
3) Trim the fabric to 1/4" seam allowance with pinking shears.
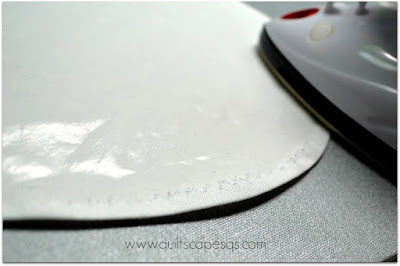
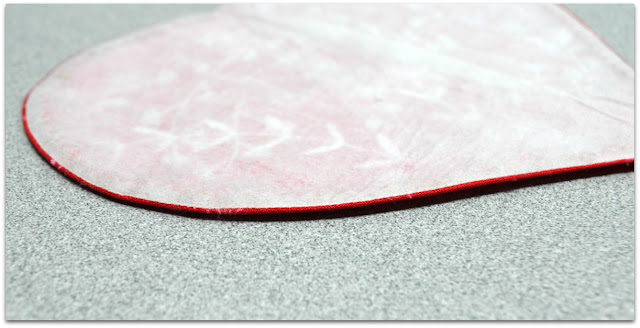
4) Iron seam allowance to shiny/waxy side of freezer paper to turn edges using a slightly lower setting on the iron. Don't over-iron, just enough so the fabric sticks to the waxy side of the freezer paper.
5) DO NOT remove the freezer paper yet! Position the appliqué piece on your background square and press it in place. The freezer paper will adhere to the background until you are ready to machine-stitch.
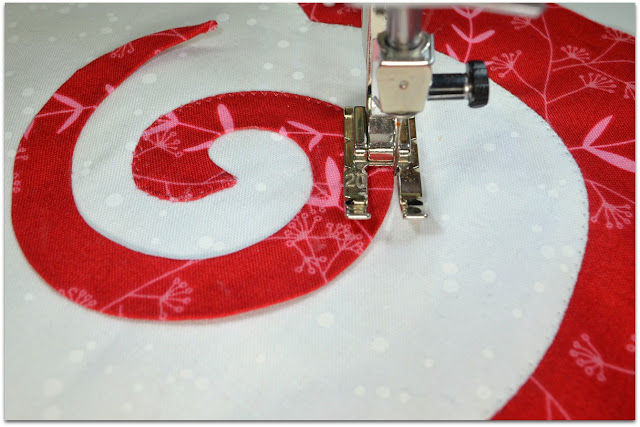
6) Machine-stitch in place. I used "invisible" monofilament thread with a tiny zig-zag stitch and regular thread in the bobbin.
NOTE: There are two types of monofilament thread, polyester, and nylon. According to Bob Purcell of Superior Threads:
"...Nylon thread should not exist in your quilting or sewing supplies
unless you want the thread to melt..."
So, be sure the type of thread you use is 100% polyester, not nylon. Be wary of labels that say "polyamide" as those are actually nylon!unless you want the thread to melt..."
A tiny zig-zag stitch, about 1.2mm wide and 1.5mm long, resembles hand stitching. Again, use the open-toe foot with the needle positioned to the far right. This helps to keep the appliqué piece aligned, for better control of where the stitches land. The "zig" stitch goes into the background alongside the appliqué piece, and the "zag" stitch takes a little bite into the edge of the appliqué.
7) Once the appliqué piece is stitched on, trim out the back side of the fabric beneath the appliqué, leaving a seam allowance. Remove the freezer paper.
Freezer Paper Pros: An effective technique, especially if you want to allow the loft of the batting to come through, especially for appliqué with several layers.
Cons: Not many that I can think of unless your scissors slip and you nick the appliqué... ask me how I know this...
Cons: Not many that I can think of unless your scissors slip and you nick the appliqué... ask me how I know this...
~~~
III. Lightweight Interfaced Lining
Eleanor Burns featured this technique at the beginning of her quilting career nearly 40 years ago, and it has become a preferred technique in some recent sew-alongs!
NOTE: Used dryer sheets may be recycled and used as lining as well! Just be sure to wash out any remaining fabric softener residue. Lightweight and cheap!
1) Trace desired shape on the wrong side of the fabric.
2) Lay interfacing on the right side of the fabric.
3) Stitch on the drawn line, overlapping beginning stitches.
4) Trim a scant 1/4" seam allowance from the stitched line, pinking or clipping any curved edges. Make a clip to, but not through the thread at any inside point.
5) Make a slice in the interfacing, then turn the appliqué piece right side out. Use a chopstick to get the edges smooth, then press.
TIP: Roll the outer edge to the inside just slightly as you press, so the interfacing does not show. The interfacing is lightweight enough not to add bulk if it overlaps at the slice. Your piece is all ready to stitch in place!
Lightweight Interfacing Pros: Beautiful, smooth edges. Cons: Not practical on tiny pieces or pointy edges, as interfacing will tear. Yikes!↓ (I tossed this one and used the template/starch technique instead.)
This sample is hand-stitched to the background. I used the same stitch as I do when binding a quilt. Knot a single strand of thread that matches the appliqué. Secure it beneath the appliqué piece then bring the needle out of the folded edge of the appliqué. Take a stitch directly into the fabric below, travel about 1/8" to 3/16" through the background, and bring the needle out of the appliqué again, coming out of the fold. Repeat.
Give a soft tug on the thread if necessary to secure the appliqué snugly against the background. The goal with hand-stitching is to stitch so the thread does not show.
Repeat stitches all the way around the piece then tie off and bury the thread between the layers, or take three tiny stitches in the background and clip the thread.
Hand-appliqué used to be a bit intimidating, but now I really enjoy it, especially the fact that it's portable!
Join me next time for the final installation in this I ♥ Appliqué Series for Traditional Back-Basting Needle Turn appliqué! Links are updated below.










July 24th, 2012 at 4:21 p.m.
February 15th, 2015 at 5:19 p.m.