
F O O T S T E P S to successful Foundation Paper-Piecing
 Paper-Pieced Hot Air Balloon pattern by Deonn
Paper-Piecing is one of my favorite techniques to get accurate, detailed shapes in quilt blocks just by stitching on the lines of a pre-printed pattern. This tutorial will show you how with an easy, step-by-step outline for this creative “piece-by-number” method of patchwork.
Supplies:

- Cute fabric scraps
- Paper scissors
- Glue Stick
- Rotary Cutter and Mat
- Add-a-Quarter ruler (optional, but very helpful!!)
- Iron
Instructions
PRINTER-FRIENDLY INSTRUCTIONS
Getting Started
**Find a pattern you'd like to try. There are plenty of free patterns available on the internet in myriads of designs. You may even want to draft your own pattern. Start with a something simple. >>HOT AIR BALLOON<< Pattern
**Use inexpensive paper, something that will tear easily. I use thin, cheap copy paper.

**Print enough for your patterns plus an additional copy to keep as a MASTER. Print from the master for consistency.
**Plan your color layout, and if necessary, shade with colored pencils or marker, or just write description/color.
**Reduce stitch length on your sewing machine to 18 –20 stitches per inch (about 1.5). This will perforate the paper and make it easier to remove when the time comes.
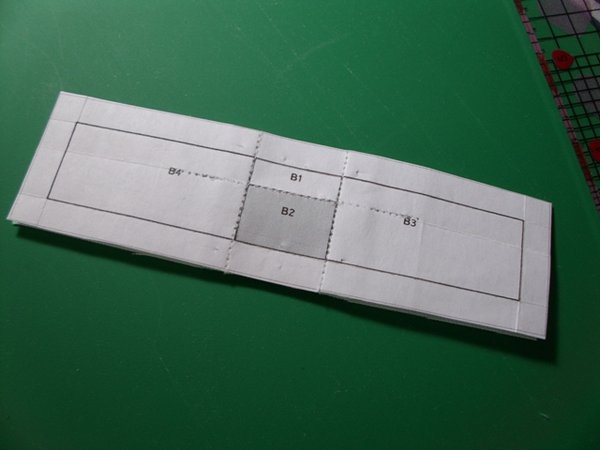
**If pattern has more than one section they will be listed as A, B, C, etc. Loosely cut sections apart, a bit beyond the seam allowance line. Do not trim on the line until block is complete.

**FOLD each solid line on the pattern. These are your stitching lines. Fold all the way to the edges.
**Place fabric for segment #1 right side up on the BLANK side of the pattern, making sure to allow a generous (up to 1/2") seam allowance on all sides of the first segment. Hold it up to a light source to check.


**Pin, use double-sided tape or lightly glue-baste fabric to the pattern.
Now you're ready for these FooTStePS!
 With printed side of pattern up, FOLD pattern on the line between the section you are working on and the next section in sequence.
 TRIM your fabric to 1/4” from the fold line. A helpful tool is the Add-A-Quarter ruler, or Add-an-Eighth if you are making tiny blocks, or you can eyeball it.
Keeping the pattern folded back, ALIGN your next piece of fabric along the trimmed edge, right sides together.


 Fold pattern back into place just before sliding under the needle, pinning if necessary, then STITCH on the printed line, beginning several stitches before the line and ending several stitches after the line.

 Flip Pattern over, unfold the top segment and PRESS with a hot, dry iron, and you're ready to begin the steps to add the next piece!
REPEAT these little FooTStePS, following the numbered sections in order of sequence.
FOLD,

TRIM,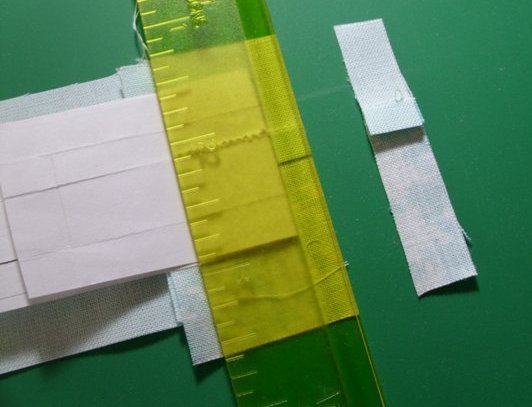
...add the next piece, pin if desired...

STITCH,

PRESS.
Continue to REPEAT these little FooTStePS until the unit is complete.
Continue to REPEAT these little FooTStePS until the unit is complete.
FOLD,

TRIM,

STITCH,

PRESS.
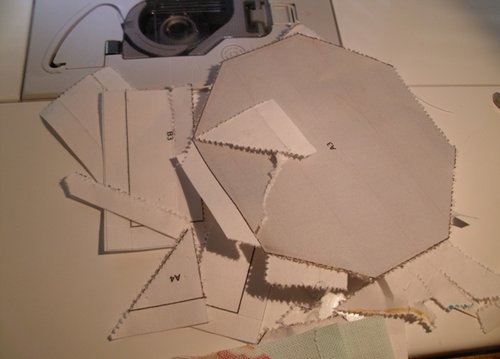
TRIM along the outer dotted line, which is your seam allowance.

See this photo tutorial to make the Hot Air Balloon

Now... Let's put them together!
With paper still on, anchor both units with a pin through the seam allowances.

Pin alongside anchor pins to secure, then remove anchor pins.

STITCH units together on the line.

Remove paper.

...have a paper-piecing perforating party...
PRESS...

Add a little stitchery...

Ready to add to a quilt or project!! Last step: SMILE!!

SUCCESS!! YOU DID IT!!
If you haven't tried this method before now, I hope this opens up a world of new adventures in quilting!! Click HERE for more ideas and helpful hints for resizing, or if your block is not symmetrical, or if you want to paper-piece without actually stitching through the paper... until then, Happy Quilting!


No comments:
Post a Comment
So happy you stopped by for a visit! Thank you!