Blanket & Buttonhole Stitches!


BUTTONHOLE STITCH


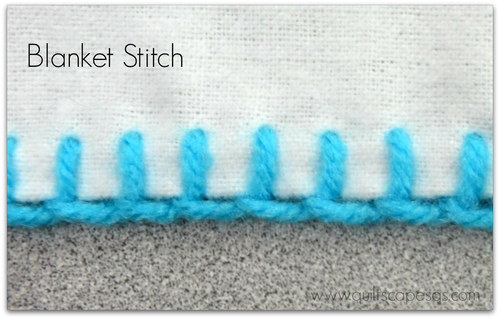
Today's vintage stitchery lesson is one of the very most practical, basic stitches: the Blanket Stitch. It makes a great finish on applique' or the edge of a blanket (hence the name). We'll try this simple stitch plus a couple of variations, then try her cousin, the Buttonhole Stitch.
Supplies:
Flannel - (1 yard for single layer receiving blanket or 2 yards for double)
Needle - (long, medium/large eye, sharp point)
Yarn or crochet thread - (coordinating color)
Instructions:
Prepare fabric by pre-washing if desired. Press, then cut a 36" square for a receiving blanket size. Serge or zig-zag to finish all edges. If using a single layer, press edges under 1/4 to 3/8". If you are doubling the layers, serge or zig-zag edges together and continue as follows:
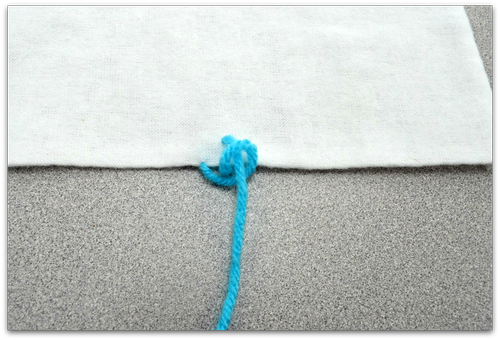
Cut a length of yarn (about 30") and thread your needle. You may want to fold over the edge of the yarn, squeeze between your thumb and finger, then push the eye of the needle over the pinched yarn to bring it through. Tie a single knot at the bottom and trim close to the knot.
BLANKET STITCH
Step 1) Begin by bringing thread out at the edge (A).

Step 2) Insert the needle into the fabric about 1/4" from the edge,
about 1/4" away from the first stitch (B).
The needle will be pointed toward the outside edge.
about 1/4" away from the first stitch (B).
The needle will be pointed toward the outside edge.
Step 3) Loop the yarn under the needle at the edge of the blanket.

Step 4) Pull the needle through the loop of yarn. 

Pull and adjust so both the stitch and the yarn at the edge are snug.

Repeat steps and continue stitches, working left to right
(top to bottom) if you're right-handed.
(top to bottom) if you're right-handed.

To turn a corner, take 3 stitches into the same spot as pictured.

To tie a knot, take the yarn down into the fold just after a stitch.
Tie a knot and clip thread. Re-thread the needle, then insert so the needle
comes out just in front of the previous stitch.
Tie a knot and clip thread. Re-thread the needle, then insert so the needle
comes out just in front of the previous stitch.

Continue stitches around your blanket. When you get to the first stitch,
complete the stitch, then tie off the thread, hiding the knot in the fold.
complete the stitch, then tie off the thread, hiding the knot in the fold.

Variation #1: Differing lengths

Variation #2: Closed (V) stitches

Both of these versions take a bit of fiddling and adjusting, but can make a nice look overall.
~~~
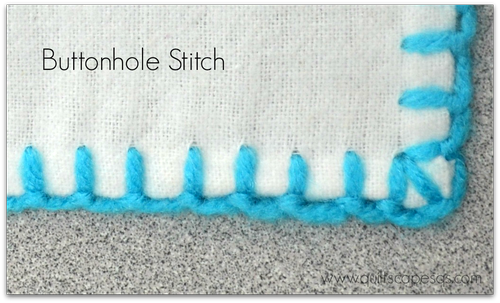
BUTTONHOLE STITCH
This stitch is traditionally used by tailors to finish the raw edges of a buttonhole. Often confused with the Blanket Stitch, the buttonhole stitch has an added extra knot at the edge. Stitches would be worked as close as possible to cover the buttonhole edge. If we stretch it out, it looks a lot like the blanket stitch; a bit more secure, less likely to be snagged by a little toe...
Step 1) Begin as before - bring yarn out at the edge (A).
Step 2) Insert the needle into fabric from the underside,
about 1/4" from the edge, about 1/4" away from the first stitch (B).
The needle will be pointed toward the quilt center.
about 1/4" from the edge, about 1/4" away from the first stitch (B).
The needle will be pointed toward the quilt center.

Step 3) Create a loop of yarn underneath the needle at the outside edge
and bring the yarn under the needle where the tip comes up (C).
and bring the yarn under the needle where the tip comes up (C).

Step 4) Pull the needle through the front of the blanket.

As you pull to bring the yarn snug, a second loop (knot) will form at the outer edge.

Continue around the blanket in this manner working left to right.


When you get close to the first stitch, complete the stitch,
then tie off the thread, hiding the knot in the fold.
then tie off the thread, hiding the knot in the fold.

ADDITIONAL IDEAS
Burp Cloth
Burp Cloth
Use extra scraps to make a burp cloth. Cut 2 rectangles, about 8 to 10" x 16". Trim in an hourglass shape, or leave as a rectangle. Layer wrong sides together and stitch the edges together (serge or zig-zag). Trim with blanket or buttonhole stitches.
Prepare for fancy Crochet Edges
For those who love to crochet and don't have access to a Hem-Stitcher, this is the perfect way to prepare your blanket or burp cloth for additional crocheted finishes.
Applique'
Use the Blanket Stitch with floss to hand-stitch applique' for a fun primitive look. I've tried it from time to time, but I have to admit, the blanket stitch is my go-to for applique' by machine. Check it out in a previous tutorial: I ♥ Applique'.
By the way, check this little tutorial How to roll a (tangle-free) ball of yarn.
Hope you enjoy this technique! Let me know if you try this, or if you have any questions. See more of my stitchery and other sewing/quilting basics tutorials right here on my Tutorials page.


No comments:
Post a Comment
So happy you stopped by for a visit! Thank you!