 |
| "Evan's Ypsilon" by Deonn Stott featuring Expressions Batiks (pages 120-130) by Riley Blake Designs |

Welcome! Let's have some adventures with quilting! (& sewing!)
Showing posts with label Alternate Ending. Show all posts
Showing posts with label Alternate Ending. Show all posts
Thursday, February 29, 2024
Another Ypsilon in the Books!
Hi, and Welcome to Quiltscapes for today's "Thank Goodness it's FINISHED" Friday! So glad you are here!
Tuesday, February 27, 2024
.jpg)
Friday, February 16, 2024
Ultimate Binding & Edge-Finishing Guide - It's Here!!

Sunday, January 21, 2024
Ultimate Binding & Edge-Finishing Guide Book - it's almost here!!
 |
| photo courtesy of Fox Chapel/Landauer Publishing |
I am thrilled and just a little bit giddy that my book is coming SOON!! February 6th is the publication date. I am on pins and needles!!
While in Houston at the International Quilt Market last fall, I met up with Amelia Johanson, the Acquisitions Editor I spoke with at last year's Market to propose my book idea. A few weeks later came the message "We have a book!" Then to see a sample of it on their shelf - well... my face...
a.jpg)
a.jpg)
Wednesday, November 8, 2023
Cuddle Buddies - Felix the Fox
 |
| Felix the Fox Cuddle(R) Blanket and Stuffie |
When I spied this adorable "Cuddle Buddies" kit over at Missouri Star Quilt Co, I knew it was the perfect thing to make for my newest grandson, born just a month ago.
Friday, October 6, 2023
Two-color Binding Tutorial
.jpg)
Here's a binding technique I had never tried before - a two-color pieced binding with joints on. the. corners! Good Challenge!

Thursday, May 4, 2023
TGIFF - Quilted Pillow with a little Extra
Hello! Welcome to Quiltscapes for today's "Thank Goodness it's FINISHED" Friday! So glad you are here!
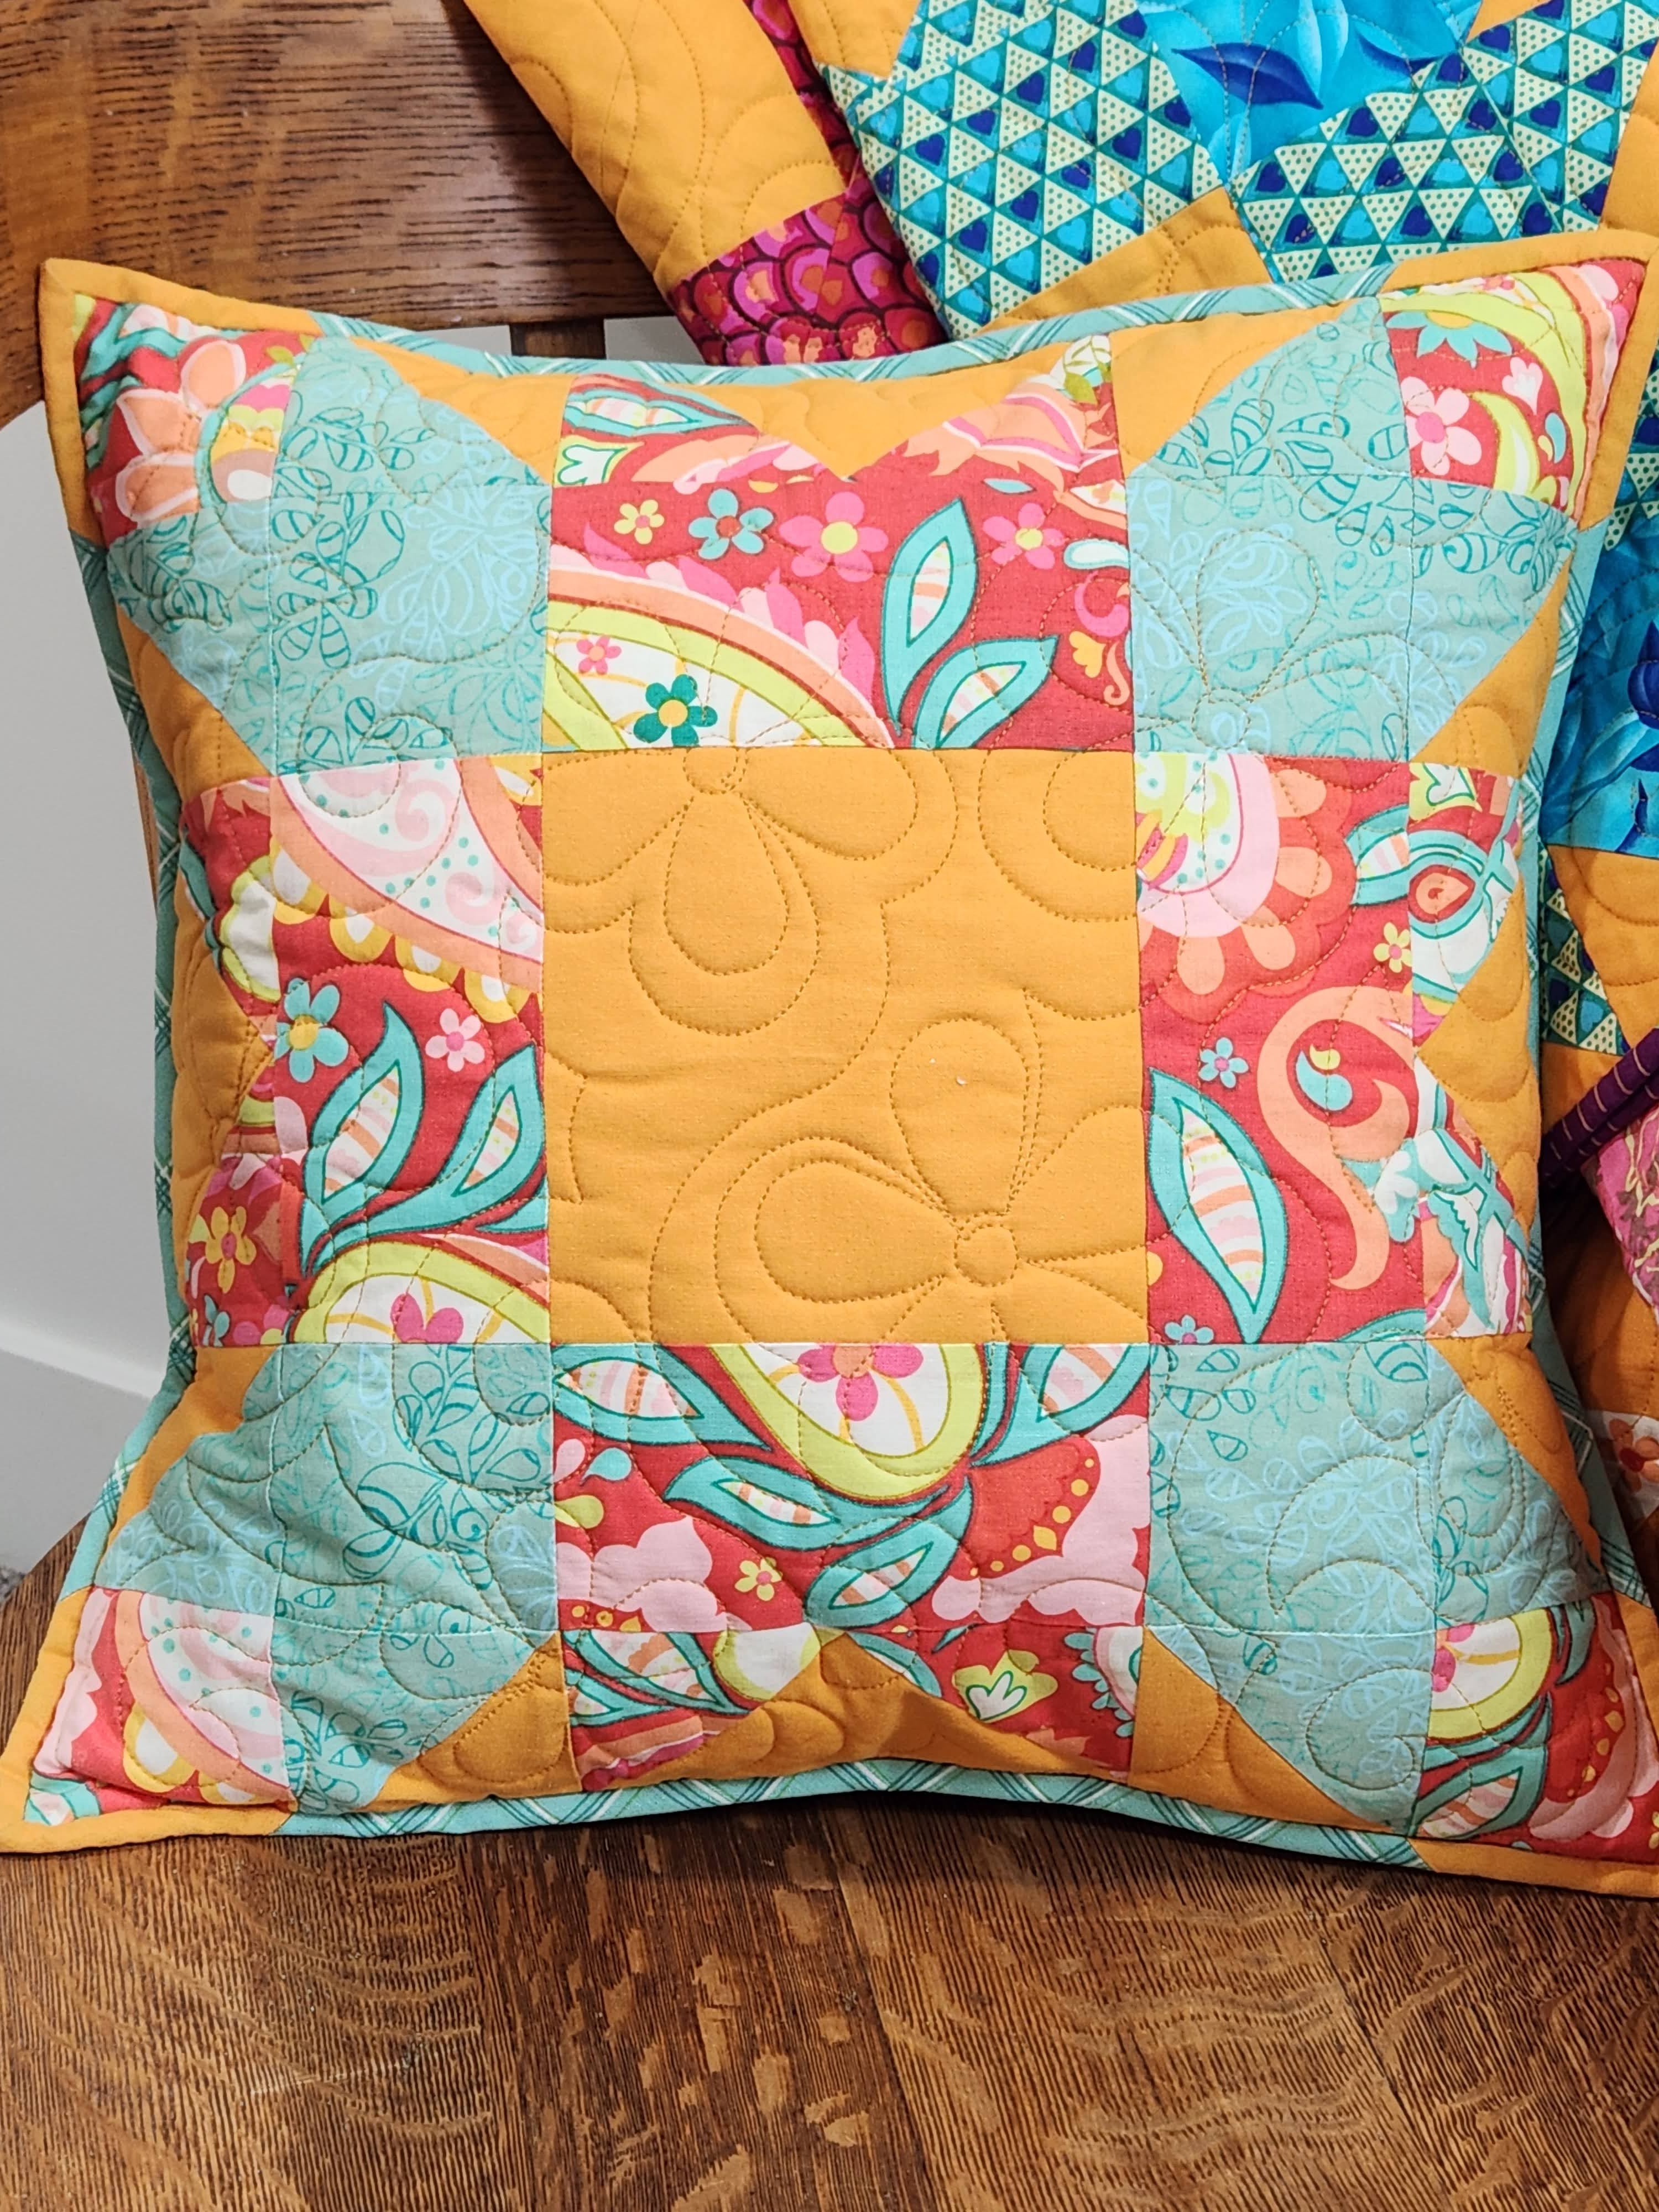 |
| "Oh, My Stars! (& Garters) quilted pillow |
 It may not look like much at first glance, but this little quilted pillow has a little something special about it. It's "Extra" as they say these days.
 Thursday, March 30, 2023
How to Roll & Store Binding
Here is my favorite way to ROLL & STORE quilt binding, using a "Figure 8" technique!
Years ago, I watched a gal at the cutting station in a fabric store rolling lace in this figure 8 manner and asked her to show me how. That was a fun way to store it, but later on, I realized that when you turn it over and pull the strip from the center, it comes out straight! Wow, I was amazed!
How many times have you started to add the binding to a quilt - especially a large quilt - and because the binding has been stored by rolling it into a circle, it pulls off in a corkscrew and you have to unroll the entire 450 or so inches of binding down the hall, through the house and down the stairs? I exaggerate.... a little! I know you know what I mean.

This trick of "pre-twisting" will fix that!

There are some super-cute binding storage gismos out there, but the binding is usually wrapped around these in a circular fashion as well, causing the same issues. Cute, yes. But I am all about finding easy, practical, economical solutions to common issues, and this figure 8 technique doesn't cost any extra!
A figure 8 roll is handy for storage, too. Sometimes I'll slip one of the loops over a hanger that holds the backing and quilt top, keeping the set together and ready for quilting.

When I'm ready to use the binding, I set the roll on my lap or on the floor by my chair and it simply pulls out from the center, ready to apply without twisting!
Leftover binding strips can be re-rolled and used for smaller projects, or pieced together for a fun scrappy binding.

Or, just keep them in a large jar to decorate your quilt studio. It's a beautiful thing. And, it makes me happy. And when I sit down to bind a quilt, I have a smile on my face.
Happy Binding!
Deonn
Thursday, December 8, 2022
Log Cabin Tree Runner & Lubkuchen
 |
| QUILTED TABLE RUNNER Based on the LOG CABIN TREE - QUILTED TREE SKIRT & ORNAMENTS pattern by Deonn Stott |
It's that time of the year, again! Carol @ Just Let Me Quilt is hosting her annual Virtual Cookie Exchange.
Thursday, November 3, 2022
Log Cabin Trees... continued

I feel really honored that the gals from Missouri Star Quilt Company have chosen a couple of my patterns to feature in recent tutorials, including the Log Cabin Tree Skirt pattern (previous post)!
Monday, February 14, 2022
Tutorial ~ How to Bind a Scalloped Edge
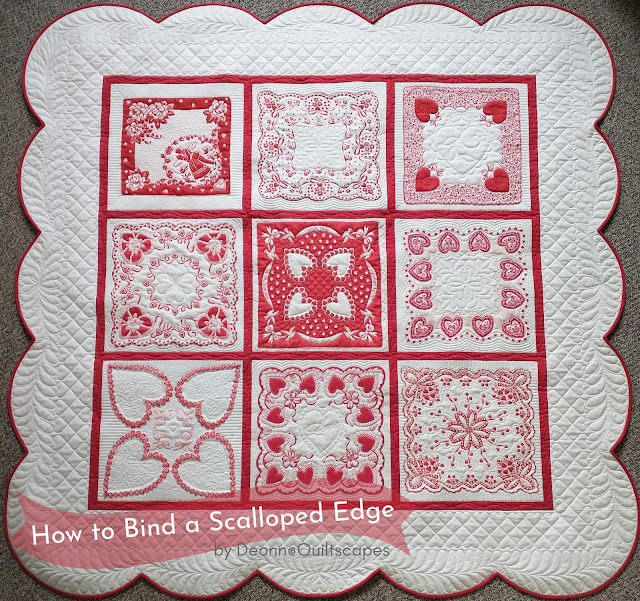
Love is in the air! This "LOVE-ly" gorgeous quilt was made with vintage Valentine handkerchiefs by my quilt customer, Shawn T. She always has wonderful, creative ideas, and this was no exception!
Tuesday, September 14, 2021
Eat Your Veggies!
 |
Dino-mite Kids' Quilt, 55" x 63" featuring Eat Your Veggies fabrics by Sandy Gervais for Riley Blake Designs. |
As the designer herself stated, who knew eating your veggies could be so fun!
Wednesday, September 20, 2017
Fossil Rim Blog Tour ~ A Dino-mite Baby Ensemble!
Sometimes, the cutest fabric comes along, and you just gotta make stuff!
 |
Baby Ensemble made by Debbie Proctor & Deonn Stott
|
Monday, January 30, 2017
I {Heart} Applique Lesson II: Chenille Applique'
Today's tutorial features the unusual technique of DIY chenille strips for applique'; a bonus tutorial in my I ♥ Applique' series for Riley Blake Designs' "Cutting Corners College".

I remember sleeping under a chenille bedspread at my Grandma's house. Soft, fuzzy caterpillar-like channels were stitched into a design on the blanket. And interestingly enough, "chenille" is actually the French word for "caterpillar."

Saturday, March 12, 2016
Best Tips for sewing with Plush Fur (Minky)
 |
| PRINTER-FRIENDLY |
Here are my best tips for sewing with this cuddly plush fur fabric; cutting, pinning, sewing, pressing, quilting, binding, care and cleaning.

1) Cutting: Use a rotary cutter with a sharp blade, a mat, and a long ruler for better, straighter cuts. You may get a little fur flying after each cut, so gently scoop up the fabric then shake it out over a garbage can, or take it outside to shake it off! Use a piece of batting, a dry washcloth or your hand to wipe off the little bits of fur left on the cutting board. Then get out the broom, dust-buster or vacuum to get the rest off the table, floor, your hair, your clothes, the bottom of your socks…

My hubby had a good laugh as he came down to the sewing room and snapped this pic.
2) Pinning: Face it, this stuff is so soft it’s slippery! Basically, pin it to death. This stuff also has a "nap", especially noticeable with a shorter length of fur. Feel it with your hand to determine which direction you want the nap to run. One direction is smooth, and the opposite direction will make the pile stand up against the grain. If pinning is not sufficient, try using a glue stick to baste edges together.
3) Sewing: Use a bit larger needle, size 90/14, ballpoint. For stitching, refer to #2. Pin, pin, pin. Remember the nap? This stuff will often slide in the direction of the nap. When stitching two layers together, it helps if the nap is traveling in the same direction. If you are sewing minky to a layer of cotton, put the minky on the bottom so the feed dogs can do their job. Sew slowly and carefully so as not to stretch the edges. You may need to tuck in the furry ends so you can easily see to line up the edges. And, if you happen to have a walking foot with upper feed dogs to help feed the fabric under the needle evenly with the lower feed dogs, you will have even better luck sewing this stuff. If you are piecing large pieces together, say for a quilt backing, stitch along the lengthwise grain if possible, as it has less stretch. Again, check the nap, then pin, pin, pin! Or go and buy the 90-inch stuff for your backing, relatively new on the market.

4) Pressing: NOT recommended. Since this product is polyester, it should be relatively wrinkle-free. Don’t iron directly. Press from the back with a damp press cloth or piece of muslin. If you iron on the front, you may end up with an iron-shaped imprint. Also, try to resist ironing super-textured plush fur such as dimple dots or rosebuds, as ironing will flatten out the texture. Trust me.*Ü* You may also throw it in the dryer with a damp cloth on low heat for about 10 minutes to release the wrinkles.
5) Quilting: I admit, I love quilting with this stuff because it really shows off the machine-quilting! I also prefer to quilt a little less densely so the loft can come through and be truly cuddly, like a warm hug from grandma. When setting up for longarm quilting, keep the lengthwise grain (selvage edge) at the sides with the stretchy cross-grain pinned at the top and bottom. Use lots of pins, with minimal space in between, say every 1" to 1-1/2". Make sure the nap is vertical, heading from top to bottom of the quilt, so when you take up the quilt you're not going against the grain. If quilting on a domestic machine, spray-baste or pin-baste your layers together and quilt using a walking foot. For free-motion quilting, drop the feed dogs and use a darning foot. Quilt with confidence, you'll love the result!
6) Binding: Quilts using plush fur may be bound with regular double-fold cotton binding, single strips of minky, or self-bound by bringing the backing around to the front.

This binding ↑ is made with 2" single-layer strips. Join the strips to make the length you need, then apply to the back of the quilt using a 1/2" seam allowance. The corners are mitered, and the binding is brought around to the front and machine-stitched using a serpentine stitch. See my plush fur binding tutorial HERE.

Again, a walking foot is very helpful. When applying the binding, be careful the quilt doesn't stretch too much on the stretchy edges, then be careful the binding doesn't stretch too much on the lengthwise edge.
7) Care & Cleaning: This product may be washed and comes out just as luscious as before it went in the washer. It doesn't shrink or fade, pill or shed. Machine-wash cold, tumble-dry low, or hang to air dry. Do NOT use fabric softener. Instead, a dryer sheet is sufficient to take out any static. Keep it clean and it will last forever.
Happy Sewing!

Monday, June 1, 2015
Fancy Finishes: Ric-Rac!

Today's tutorial is sponsored by Riley Blake Designs featuring fabrics from their new line by Zoe Pearn, Summer Song 2 and a few of my favorite notions they call Sew Together.

RBD's 1-1/2"-wide Jumbo Ric-Rac is my favorite for a quick finish - I think it resembles scallops without all the effort!
 |
| "Simple Sadie" pattern |
Supplies:
 |
| This fabric is so adorable, even the selvages are just too cute!! |
Cut: 1 @ 34 x 42" rectangle, 4 @ 5" squares
5/8 yard border print;
Cut: 2 @ 5" x 34" strips, 2 @ 5" x 42" strips
1-1/2 yards backing (RBD Gingham or Swiss Dots)
1/3 yard binding (optional) OR 6 yards Jumbo Teal Ric-Rac
48" x 58" batting
GLUE STICK! (a few, maybe!)
Removable fabric marking pen
I also added a little Hot Pink gathered gros-grain ribbon (6 yards) at the seamlines (do that before adding the ric-rac). Simple cuteness.


I love it, but couldn't figure out how to get the corners decent. So I opted for the scallop look. Whatever is laid out on the quilt body, that's what will show, minus the seam allowance, once the seam is sewn.

Instructions:
Cut out fabrics as indicated. Stitch side borders to quilt center. Stitch 5" squares to each end of the top and bottom border. Match seams and sew top and bottom borders to the quilt. If adding gathered ribbon trim to the seamlines, use a glue stick to position, then machine-stitch right down the center. It is also helpful if you have pressed your seams open.
Mark each corner of the quilt top with a removable marking instrument to indicate the 1/4" stitching lines. I like my Frixion gel pens, with heat-removable ink.

Cut ric-rac to fit each side with a bit of overlap. Use a glue stick or pins to position the ric-rac in just the right place. Remember, what you lay out on the body of the quilt is what will be flipped to the outside edge once the seam is sewn, so be careful to keep that inside corner free of trim.

Careful to keep the inside corner free.

Stitch to baste the ric-rac in place with a scant 1/4" seam allowance.

Now, to get that no-binding finish--the Knife-Edge or Envelope Finish. This technique works best on small projects, crib-size or smaller.
1) First, lay out the backing with quilt top right sides together and pin.

2) Stitch all the way around the perimeter of the quilt, using 1/4" seam allowance (from the edge of the quilt top, not including the ric-rac). Leave an 8- to 10-inch opening on one side for turning. Trim the backing if necessary.

3) Next, place quilt, top side down, over a piece of batting, about 3" longer and wider than the quilt. I like Hobbs' Polydown for a comfy baby quilt. Gives a little extra pouf. Pin through all three layers.

Stitch along the same stitching lines used to sew the top and backing together. Pivot at the corners and leave the same opening.
 Trim the batting to about 1" from the stitches. Clip the corners or try turning the corners using my No-Clip Corner technique.
4) Turn the quilt right side out through the opening.

Stitch along the same stitching lines used to sew the top and backing together. Pivot at the corners and leave the same opening.

4) Turn the quilt right side out through the opening.

5) Hand-stitch the opening closed.

 |
| "Simple Sadie" 43" x 53" baby quilt featuring Summer Song 2 by Zoe Pearn for Riley Blake Designs, and Sew Together notions. |

This sweet Bloomin' Posy topper also features coordinating 3/4" ric-rac.

Tried to set my serpentine stitch (darning stitch) to apply the small ric-rac. Worked pretty well with a stitch length of 2.5 and a width of 5.0. Or you can just stitch a straight line down the middle.

 |
| Small ric-rac accent |
Jumbo ric-rac makes a quick finish on this PJ pillow. And more gathered ribbon for the purse handle.

Jumbo ric-rac alaso makes great flower stems! In both the "Sheep Shape" quilt and the "Hexagarden" below, after basting in place, I used an edge-stitch to sew down each side of the stems.
.


Hope you enjoyed this little Fancy Finishes tutorial and showcase of a few of my favorite things!

Subscribe to:
Posts (Atom)