Here's another great vintage technique made modern!
I learned to sew from my mother, tied my first quilt at around age 8, and have spent many hours (days, years, decades...) in the sewing room with Mom, sisters and eventually my own children. I offer professional longarm quilting services at Quiltscapes Quilting, where I also teach quilting and sewing classes in my "Quilt School".
I love to dream, design, learn, make and teach all things quilty. It's my personal quest to always look for budget-saving ways to simplify the process!
Thanks for joining me for this final installment of my "Shall We Gather?" tutorial series. Just in case you missed one, here are the links:
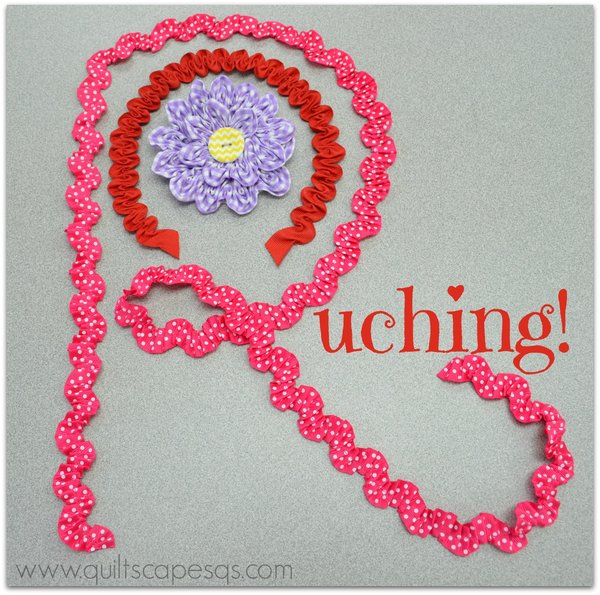
Now, let's rush on to RUCHING!!
First, a definition:
ruche or rouche (pronounced "roosh"): French sewing term which means to gather, ruffle or pleat in a repeating pattern to form ruffles, scallops or petals; A strip of pleated, fluted or gathered piece of fabric used for trimming.
And for us today... it's just another cool gathering technique with a fancy name!
Supplies:
1 yard 5/8" ribbon, a 2" strip of fabric, cut width of fabric or on the bias (45-degree), needle and matching thread, marking instrument, 3" circle of felt or felted wool, pin back or clip, hot glue gun and glue sticks.
~~~
RUCHED RIBBON
For measuring purposes, ruching will reduce the length of your ribbon by half at the least, and up to 3/4 at the most. Calculate 2 x the desired length for a loose gather, or 3 to 4 x the length for a tight gather if desired.
With a removable marking pen or other instrument, transfer a zig-zag pattern on the right side of a piece of ribbon. Click here >> PRINTABLE TEMPLATE

In order to trace, I trimmed the outline of the corresponding size for my 5/8" ribbon.

I actually used my Pounce chalk dust powder puff to mark mine. Saves time, and I just wiped off the table.

Thread a large-eye needle (crewel embroidery or milliner's, size 9 or 10) and knot the end. Use strong, sturdy, thread, single- or double- threaded through the needle. The length of thread to use is the length of your ribbon.
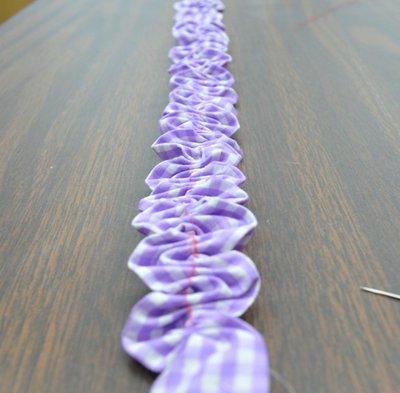
Beginning at one end of the ribbon, take a running stitch along the drawn pattern, using 1/8" to 1/4" running stitches. This can also be done on the machine, as long as the pattern is consistent. By the way, the chalk dust stayed put long enough to stitch along the marked lines, then I brushed it off to continue.
Pull up the threads to gather to the desired length, and as the gathering thread is drawn up the ribbon will form scallops. Tight gathers are about 1/4 the length of the ribbon used.

That was a little tight for my taste, so I lengthened it to 18", 1/2 the length of the ribbon. Smooth out the gathers to make scallops even, then knot the end and clip the thread.

Apply where desired as a trim, stitching by hand or by machine.
~~~
RUCHED FABRIC STRIPS
Next we'll use a 2" x about 40" strip of fabric and ruche it in the same manner as above, then swirl it around in a circle to form a ruched flower.
Prepare your strip by folding the raw outside edges to the center. PRESS to form a 1'' folded strip.

MARK using the corresponding size template. This time, I used a Frixion iron-off pen to mark the zig-zags.

Hand- or machine-stitch on the drawn lines to gather. (Oops, should have pressed out the lines before I pulled up the threads to gather! Marks disappear with heat, so I can iron later.

RUCHED FLOWER
A 1" x 40" width of fabric should gather down to about 14" in length, the perfect size to form a spiral flower. Start in the center, and swirl the ruching in a spiral. Tuck the raw edge under and stitch to secure.

If applying to a quilt or pillow, stitch directly to the fabric through the basting lines. If you are making a stand-alone flower for a pin or headband, stitch or hot-glue to a 3" circle of fabric, felted wool or crinoline. Add a cute button center and a pin-back or clip depending on how you'd like to use the flower.

~~~
PRE-RUCHED RIBBON

Here's another option: PRE-RUCHED ribbon trim, available from Riley Blake Designs. Ask for it at your local quilt shop. The ribbon comes in several colors, and the work is already done for you! Here are a couple of samples of how I've used this adorable gathered gros-grain ribbon:
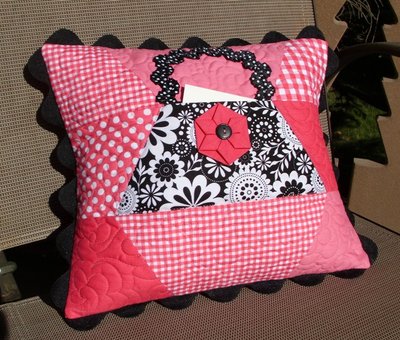
 Purse handle in this PJ Pillow (see TUTORIAL)
Inner trim on this "Hexagarden" Wall Hanging (see PATTERN)
Now Ruche out and give Ruching a try! You'll love it!

Next time we'll take a look at some simple Gingham Embroidery stitches... more great vintage sewing techniques to come! Meanwhile, Happy Stitching!

see SLIDESHOW

see SLIDESHOW


July 08th, 2014 at 5:38 p.m.
July 08th, 2014 at 6:06 p.m.
July 09th, 2014 at 11:28 p.m.
July 10th, 2014 at 8:14 a.m.
Hello, Astrid, Yes, you can cross over to the other side of the ribbon at the points and continue stitching. Deonn
October 29th, 2014 at 1:36 p.m.